Installation and use of compiled software
1. Overview
- This is the CI130X Software Development Kit (SDK) environment installation and use manual, which is designed to facilitate developers to quickly develop code.
2. Software download
- Official website Visual Studio Code To download VSCodeUserSetup, you must have VSCodeUserSetup-x64-1.60.0.exe or above.
3. Software installation
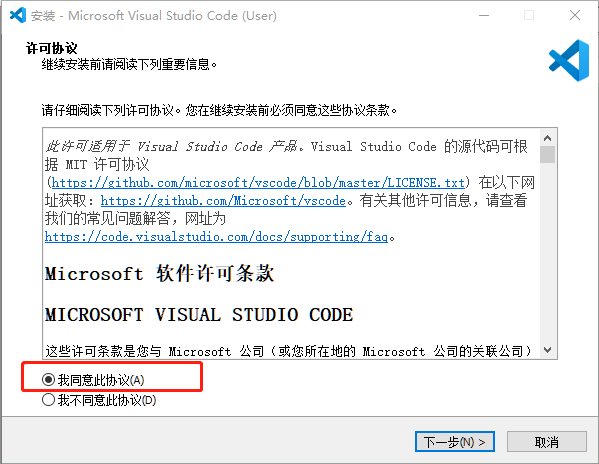
- Double click to install VSCodeUserSetup-x64-1.60.0.exe, select the agreement agreement, and then go to the next step
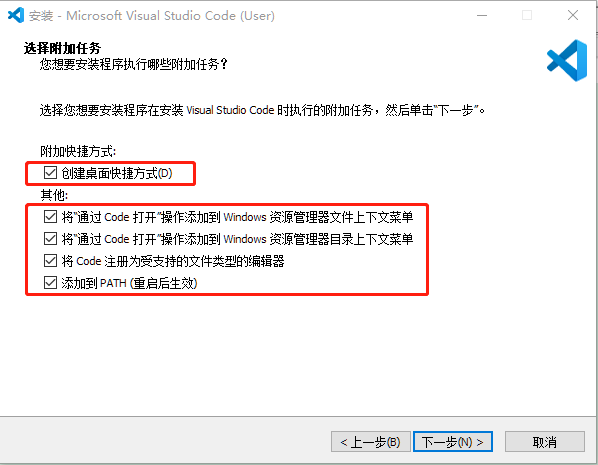
- Check the following configuration and click Next
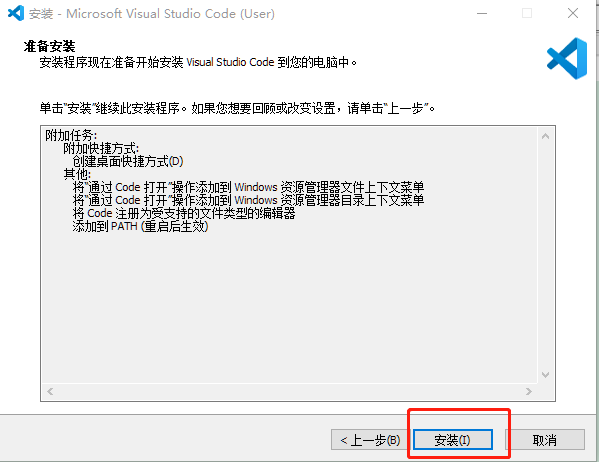
- Point mounting
- Wait for the installation to complete.
3.1 Methods of opening the project
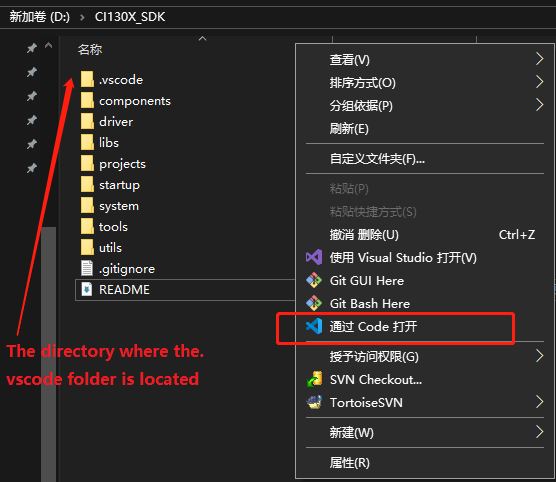
Method 1: Enter CI130X_ SDK folder (the directory where the. vscode folder is located). Right click “Open via Code” in the blank space:
Method 2 : Select CI130X_ SDK folder (the upper level of the. vscode folder), right-click Open via Code:
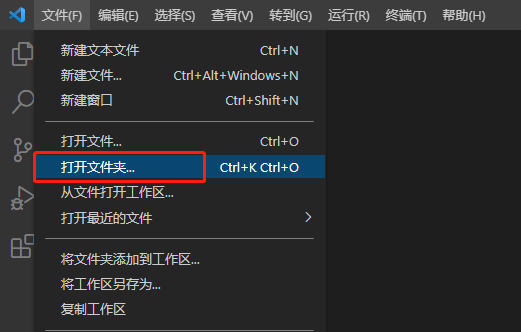
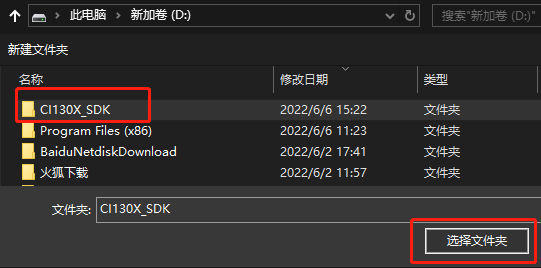
Method 3: First open the vscode software, as shown in Figure 3-6, through the menu bar ->File ->Open Folder, and then select CI130X as shown in Figure 3-7_ SDK folder (one level above the. vscode folder)
4. Compilation steps
4.1 Shortcut key of mode 1
- Press the shortcut keys Ctrl+Shift+B, and select compile or clean in the pop-up window below.
4.2 Method 2: Click icon
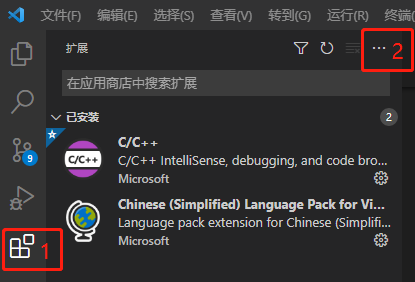
- First install the plug-in, click the software store icon on the left as shown in the figure below, and then click the three ellipsis icons on the upper right corner
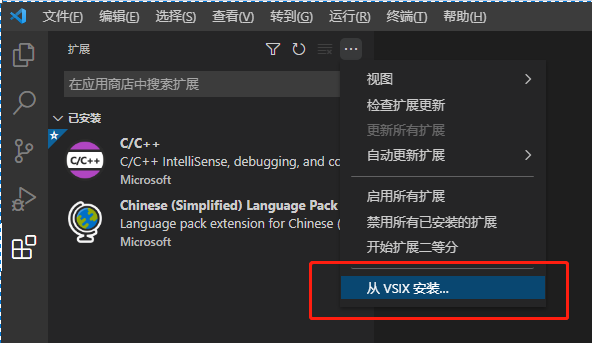
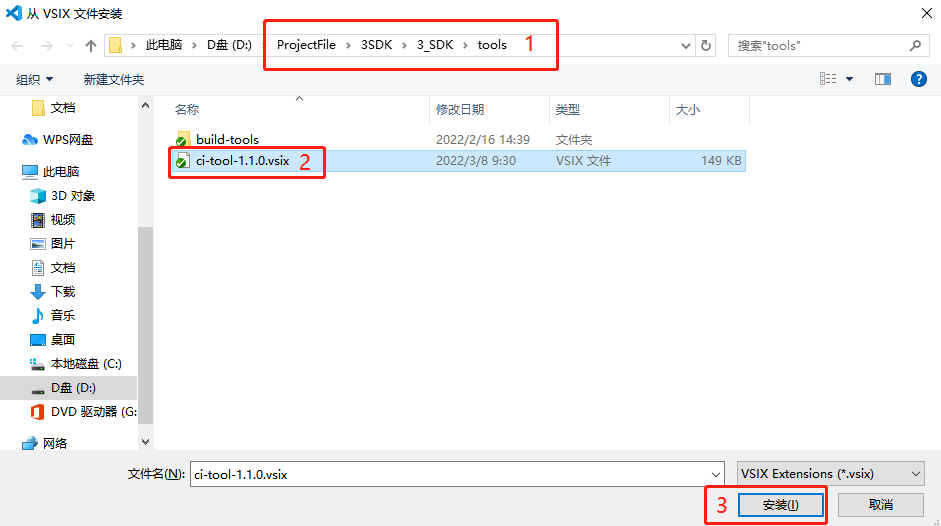
- Select “Install from VSIX” or “Installed from VSIX” from the options shown by clicking the ellipsis
- Find the SDK/tools/ci-tool-1.1.0.vsix installation and wait for the installation to complete. The following compilation icon will appear in the upper left corner.
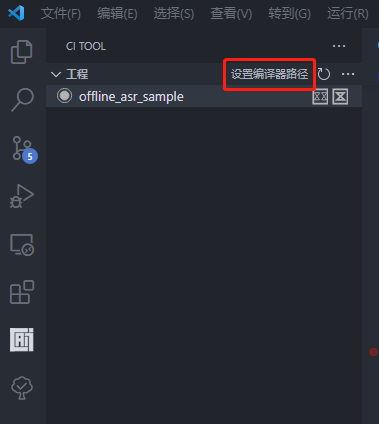
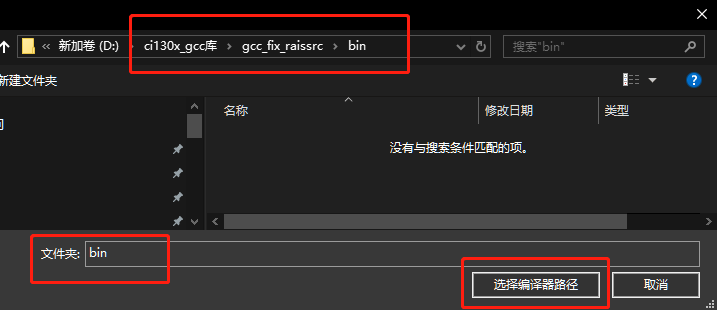
- Install the gcc compiler tool chain and unzip the ci130x_ Gcc library. rar to any directory, click the project figure below to set the compiler path.
- Select compiler path:
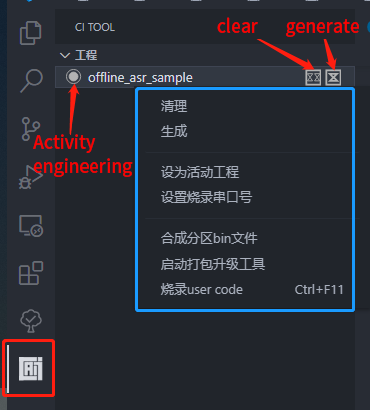
- Click the AI icon in the figure below, and you can see all project names in the option box in the upper left corner
- Right click the project name to be compiled. The options and functions are described as follows:
1: “Generate” : compile
2: “Clean” : Clear
3: “Set as Active Project” : The shortcut key compilation method compiles the active project by default
4: “Set burning serial port number” : Enter the serial port number, such as com3, which is not case sensitive. Please ensure that the input is correct and not occupied.
5: “Composition partition bin file” : Call the composition partition bin file.bat and run composition on the command line in the vscode software output window
6: “Start the package upgrade tool” : Start the serial port upgrade tool. exe
7: “Burn user code”: Burn user_ code.bin
5. Method of adding source files
Description
If users add new source code files in the SDK of CI130X, they must find the project file SDK projects offline_ asr_ sample\project_ file\source_ File.prj, refer to the following example to add files to the project compilation.
5.1. Add. h header file
- Find the location of the//header file path. Note, and fill in the relative path of the. h header file with reference to the example
//header file path.
include-path: driver/ci130x_ chip_ driver/inc
include-path: driver/boards
5.2. Add. c source file
- Find the location of the//source files. Note, and fill in the relative path of the. c source file with reference to the example
//source files.
source-file: driver/ci130x_ chip_ driver/src/ci130x_ core_ eclic.c
source-file: driver/ci130x_ chip_ driver/src/ci130x_ core_ timer.c
5.3. Add. a library file
- Fill in the relative path of the. a library file by referring to the example
library-file: libs/libnewlib_ port.a
library-file: libs/libasr.a
6. Firmware burning
- To burn the firmware for the first time, you need to use the package upgrade tool to burn the synthesized firmware. For the method, please refer to step 4 and step 5 in CI130X_SDK_Quick_Start. In order to facilitate development and debugging, the compiling software integrates the function of burning only use code. The following is the method and precautions for burning use code during debugging:
6.1 Step 1 Package and Upgrade Firmware
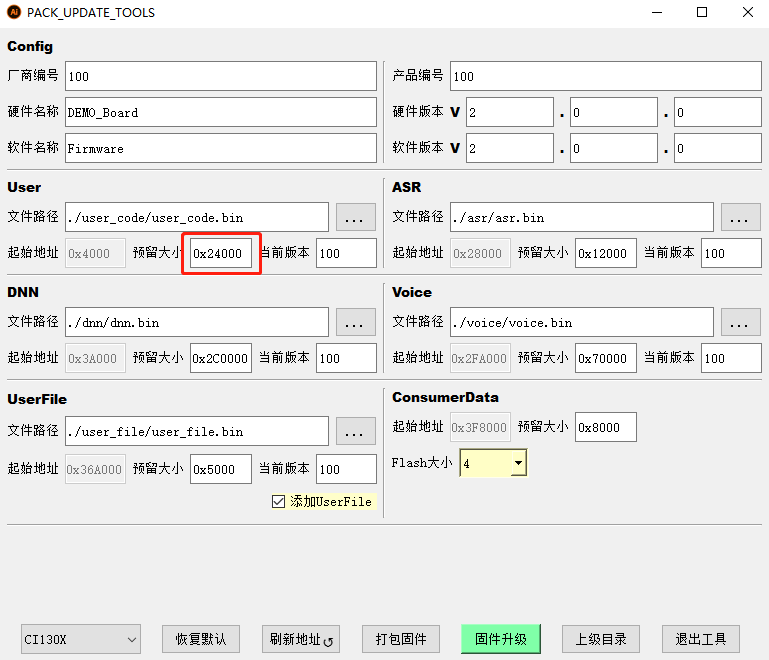
- Start the package upgrade tool, enter the firmware package interface, and reserve a suitable size for the user code partition, as shown in the figure:
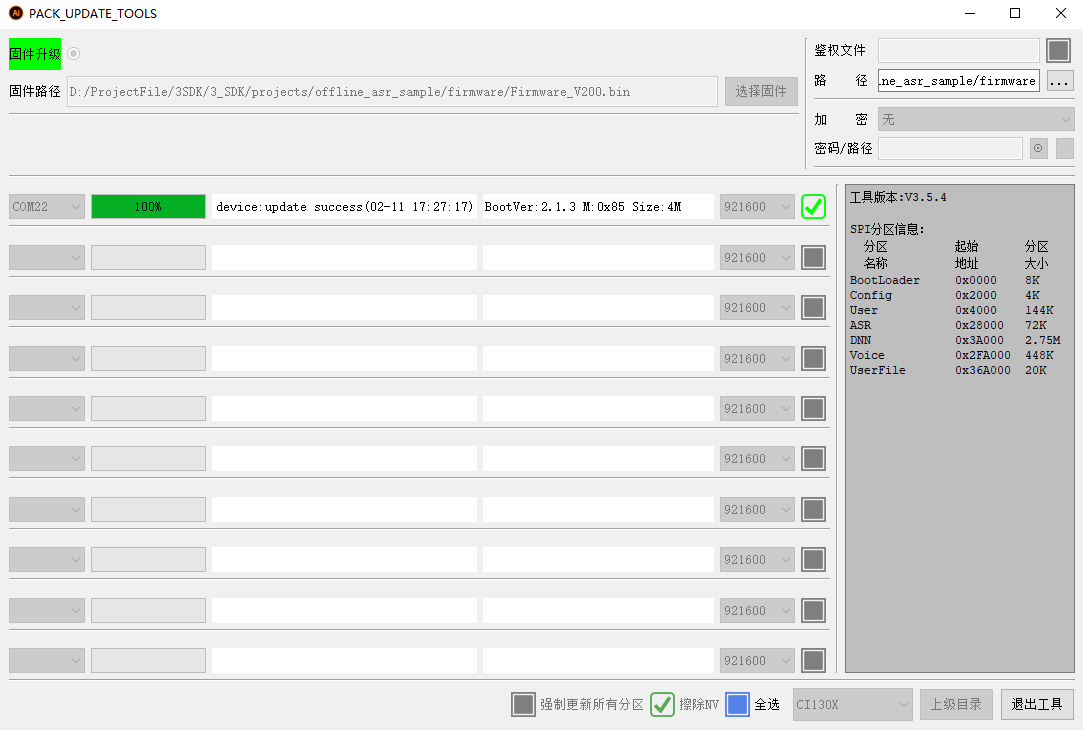
- Click Firmware Upgrade to burn synthetic firmware
6.2 Step 2 Burn the use code
-
For applications that only modify the use code partition during debugging, they can be directly burned in the vscode compiler without repackaging and upgrading the firmware. The upgrade method is as follows:
-
Right click the project name, select Burn use code (or press Ctrl+F11), and perform hardware reset according to the following prompts:
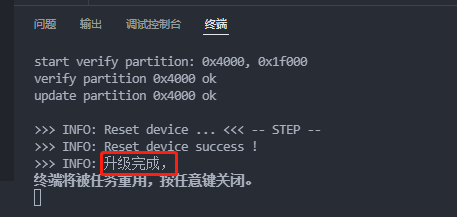
- The upgrade completion interface is as follows:
7. Common problems
7.1. Failed to upgrade use code
- The reason is that the current burning use_ code. The bin size exceeds the size reserved for the user partition in the firmware. To solve this problem, use the firmware packaging and upgrading tool to repackage the firmware and increase the use partition to a reasonable value. Refer to Section 6.1.
