Chipintelli 2nd Generation Encryption Dongle User Manual
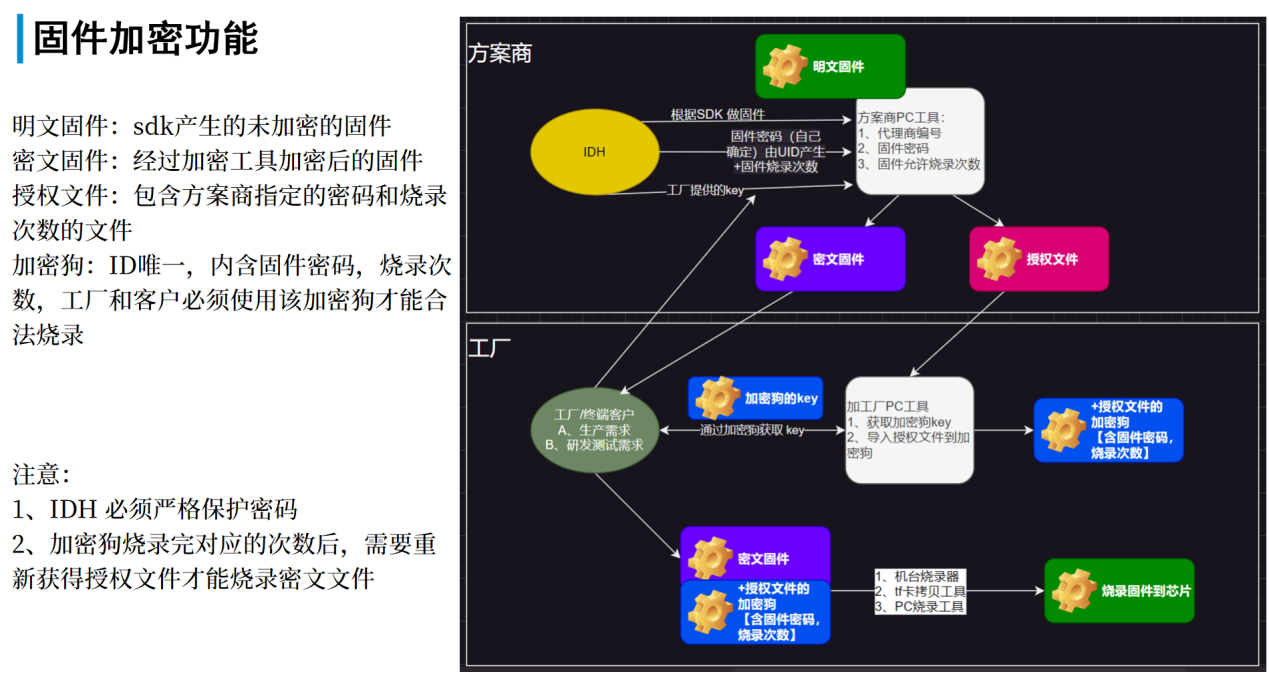
Figure 1 below illustrates the functionality and overall workflow of the encryption dongle:
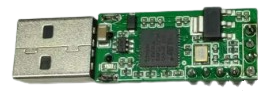
The physical appearance of the dongle is shown in Figure 2:
1. Factory Operation Process
1.1 Host computer instruction
-
Double-click to open the tool:
ci_encryption_tool_工厂\\ci_encryption_tool_工厂.exe. As shown in Figure 2, after successful program execution, the dongle hardware will be detected and displayed in the hardware device list. -
Insert the dongle into a USB port on your computer.
-
Select the dongle -> Set output path -> Click “Generate Key” (can be generated multiple times until written to the dongle). After “Success” is displayed, a corresponding .key file will be generated in the output path.
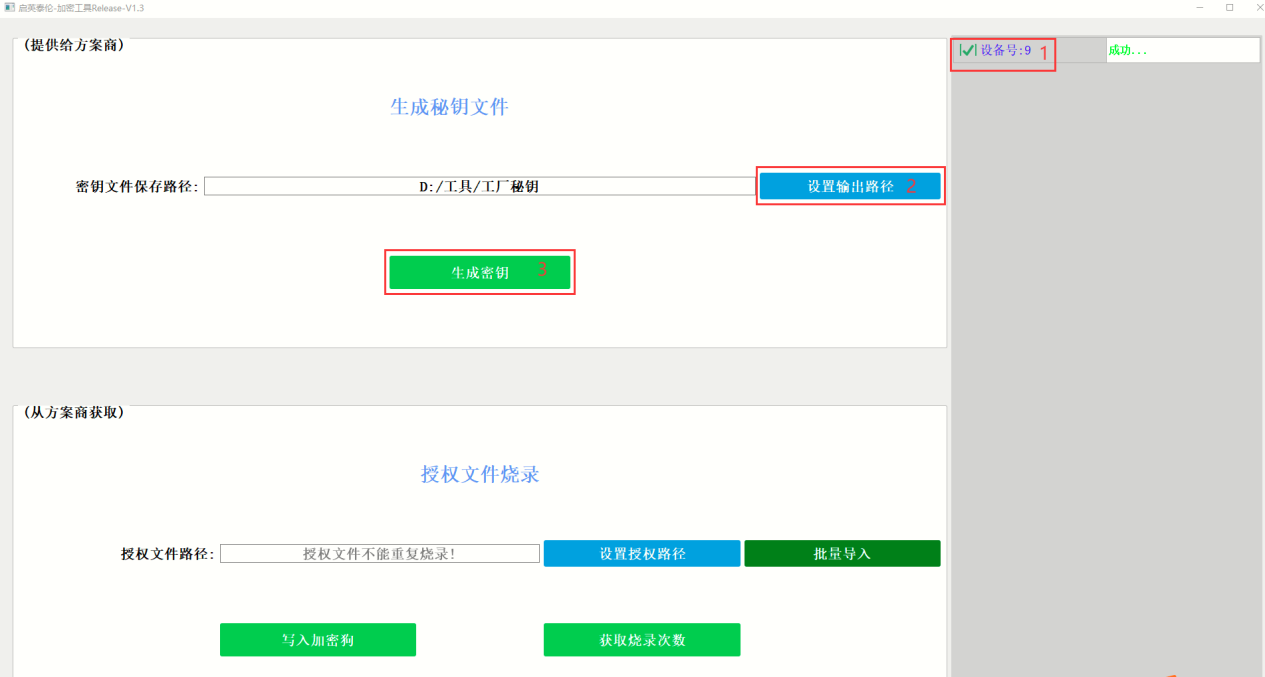
Figure 3 -
Send the
dongle_num_xx_key.keyfile (where xx is the device number of the selected dongle in the device list on the right side of the tool) from the path shown in step 3 to the solution provider. -
The solution provider will generate an authorization folder named
dongle_xx_auth_file(where xx represents the device number) based on the .key file and firmware, as shown in Figure 4.

Figure 4 -
Follow the steps marked in red in Figure 5: Select Dongle Device -> Set Path -> Write to Dongle to write the authorization file to the dongle. Wait for the operation to complete.
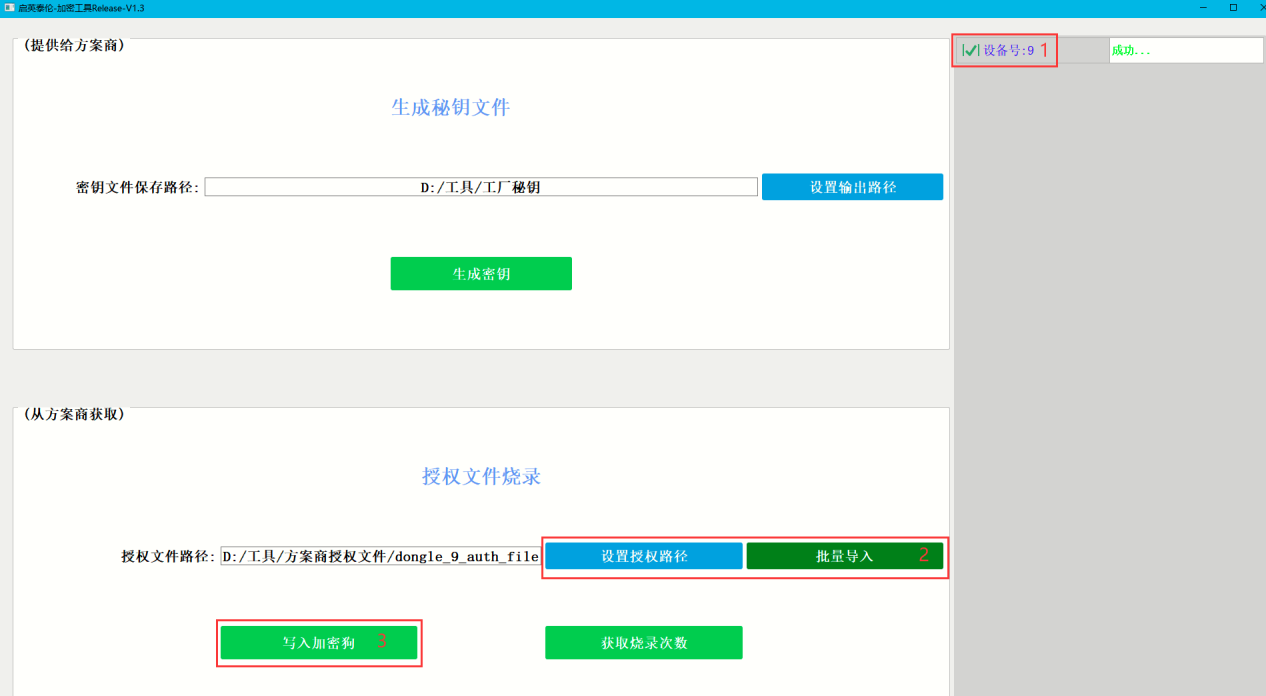
Figure 5 -
You can check the remaining number of allowed programming attempts by clicking “Get Programming Count” in Figure 4.
1.2 Encrypted Firmware Programming
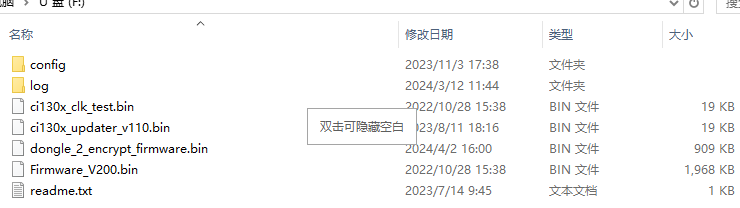
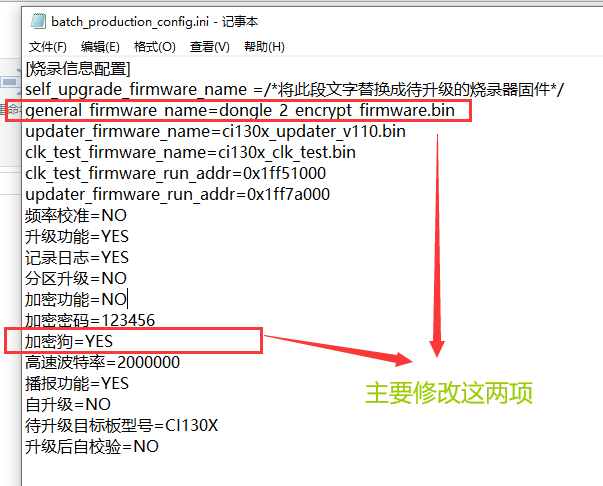
Place the encrypted firmware dongle_xx_encrypt_firmware.bin into the TF card of the offline programmer, and modify the batch_production_config.ini file according to the configuration shown in Figure 6.
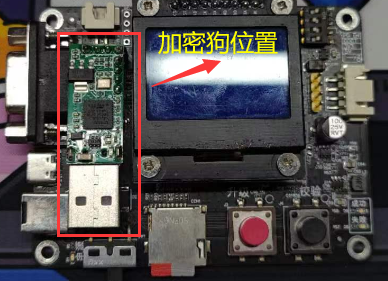
As shown in Figure 7, insert the dongle into the offline programmer, power it on, and proceed with programming using the standard method.
2. Solution Provider Operation Process
2.1. Double-click to open the tool: ci_encryption_tool_方案商\\ci_encryption_tool_方案商.exe.
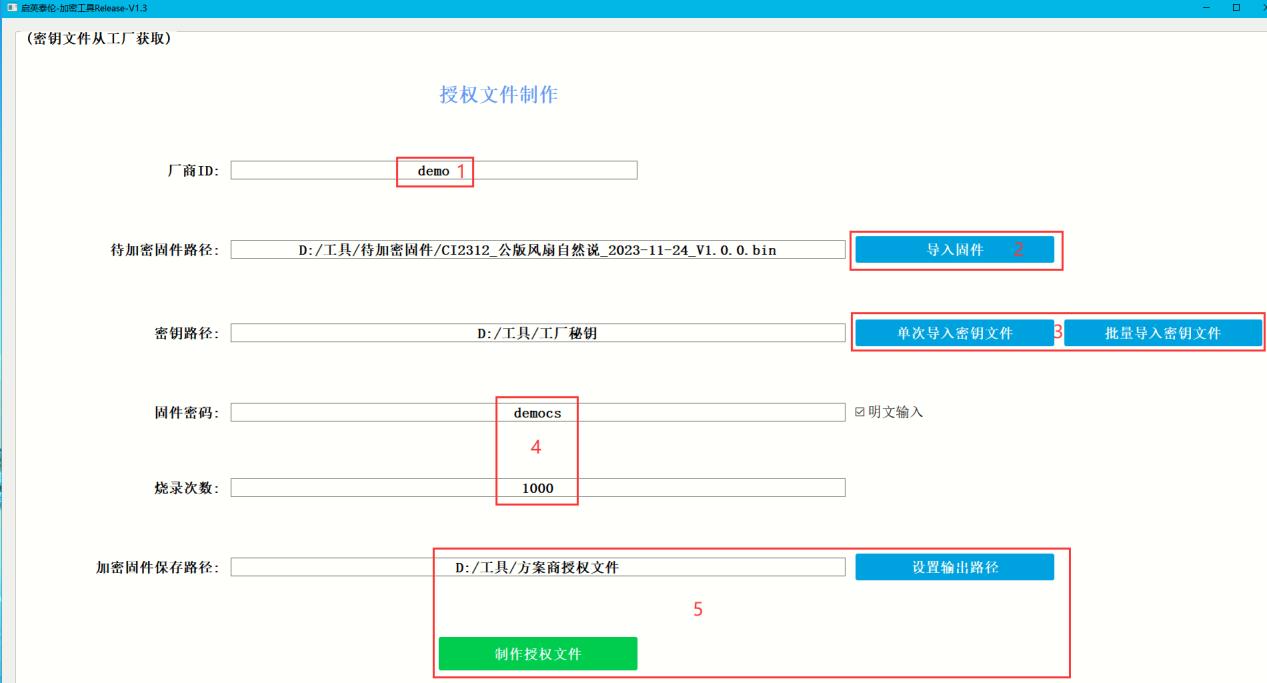
2.2. Follow the steps marked in red in Figure 8 and fill in the following:
a. Vendor ID (customizable).
b. Click “Import Firmware” and select the firmware to be encrypted in the dialog box.
c. Click “Import Key File” and select the xxx.key file obtained from the factory.
d. Enter the firmware password. This is the password that was hardcoded in the SDK when the solution provider created the firmware.
e. Set the number of programming attempts to limit how many times the factory can program the device.
f. Click “Set Output Path” to select the directory where the authorization folder will be saved.
2.3. After obtaining the authorization folder, send it to the factory.

