IDE Setup & Guide
1 Introduction
The CI13XX series chip SDK is primarily developed using the C programming language. Visual Studio Code (VSCode) and its marketpplace extensions provide excellent support for C development, including powerful plugin functionality for custom extensions. Therefore, it has been selected as the default editor for the CI13XX series chip SDK. Combined with Chipintelli’s compilation plugin and a series of tools, it forms the IDE for the CI13XX system-on-chip SDK.
Note
IDE (Chipintelli Integrated Development Environment) is an application that provides a comprehensive development environment for programming, typically including a code editor, compiler, debugger, and graphical user interface tools. Developers need to use the officially recommended IDE to edit, compile, link, and debug the Chipintelli Software Development Kit (Offline Speech Recognition SDK).
2 Download VSCode
Microsoft Visual Studio Code is a free, powerful, and lightweight code editor for Windows, macOS, and Linux, built on the open-source VSCode project. The editor integrates all the features expected of a modern editor, including syntax highlighting, customizable keyboard bindings, bracket matching, code snippets, and out-of-the-box Git support.
- Visual Studio Code ☞ Free Download Link
3 Install VSCode
- Double-click the downloaded installation file, accept the license agreement on the pop-up screen, and click
Next. - Select all configuration options, then click
Next. - Click the
Installbutton. - Wait for the installation to complete.
4 Open CI13XX SDK Project
If you haven’t downloaded the CI13XX series SDK yet, you can search and download it from ☞Chipintelli AI Speech DevelopmentPlatform - Development Resources.
Method 1: Navigate to the SDK folder (directory containing the .vscode folder), right-click in an empty space, and select Open with Code:
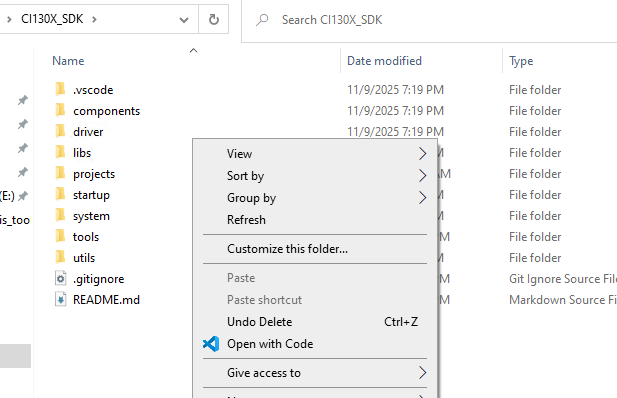
Method 2: Select the CI130X_SDK folder (parent directory of the .vscode folder), right-click and select Open with Code:

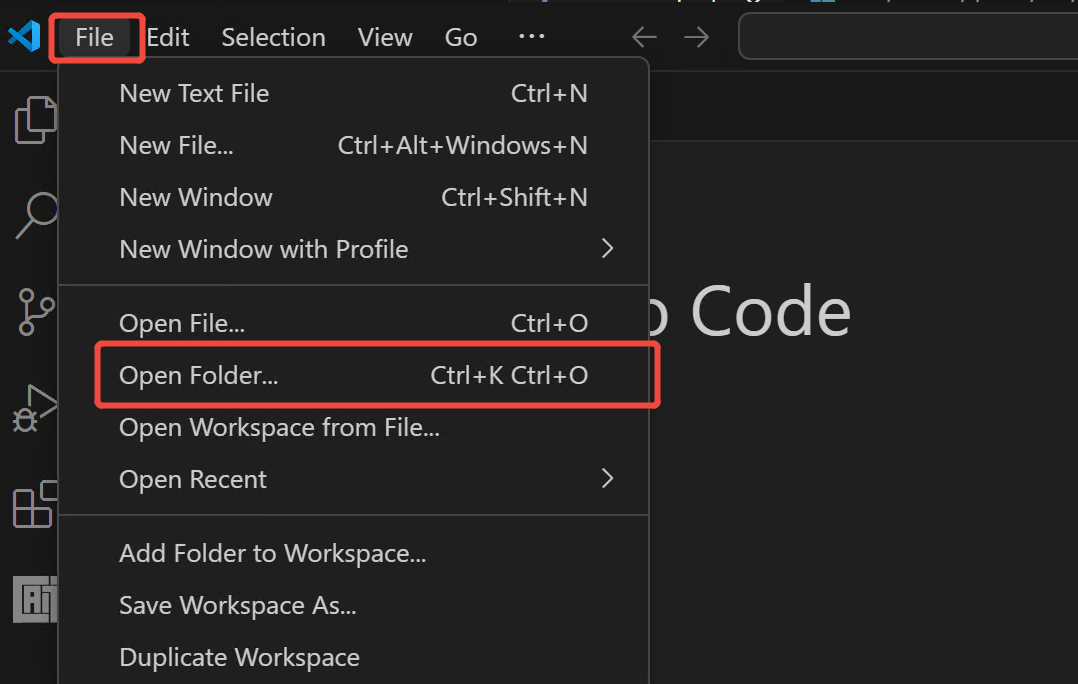
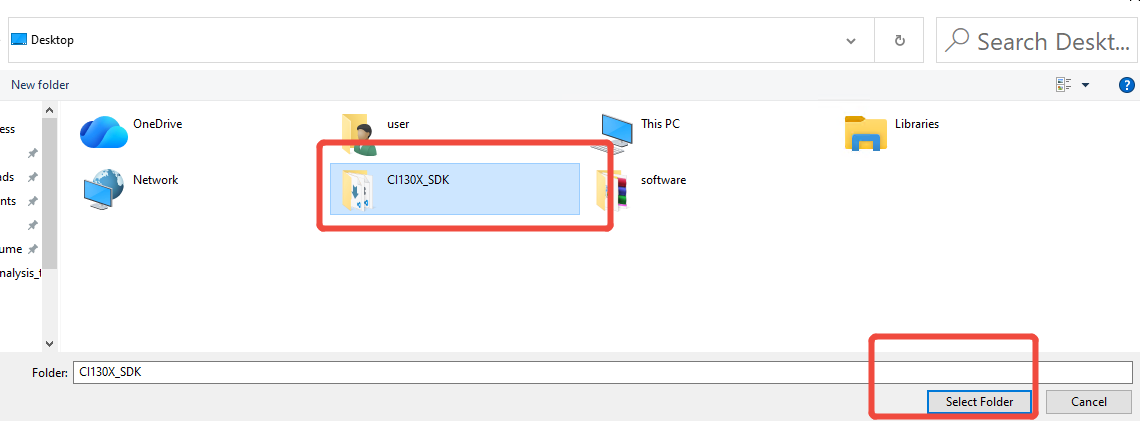
Method 3: First open the VSCode software, then go to Top Bar -> File -> Open Folder, and select the CI130X_SDK folder (parent directory of the .vscode folder) as shown in Figures 3-6 and 3-7:
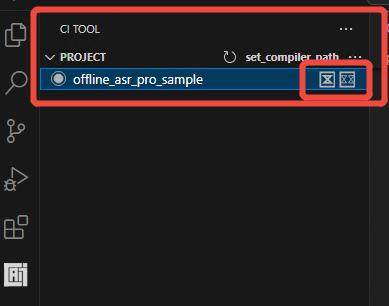
5 Install CI Tool
- Click the Extensions icon on the left sidebar, then click the three dots icon in the top right corner.
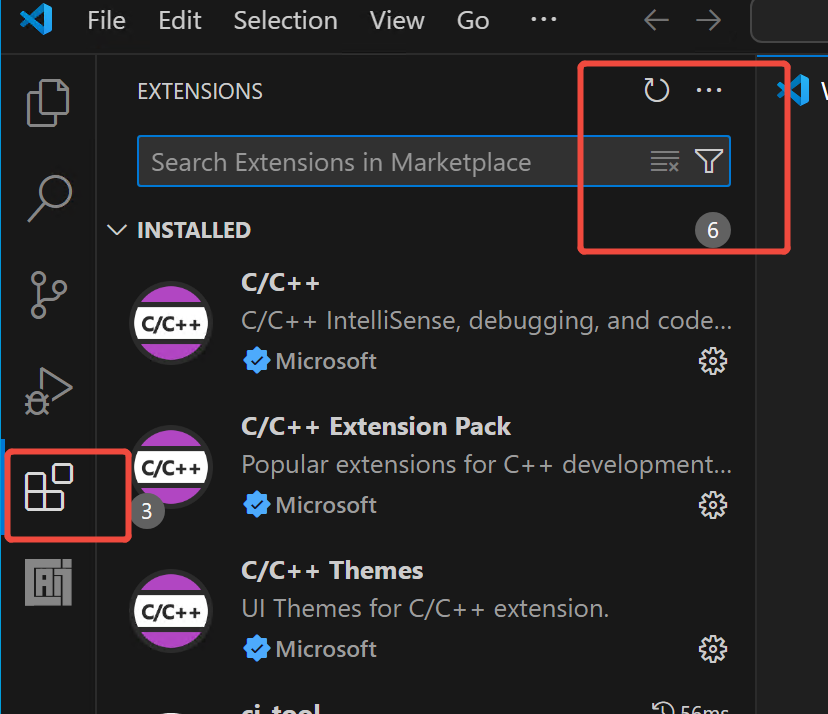
- In the popup menu, select
Install from VSIX.

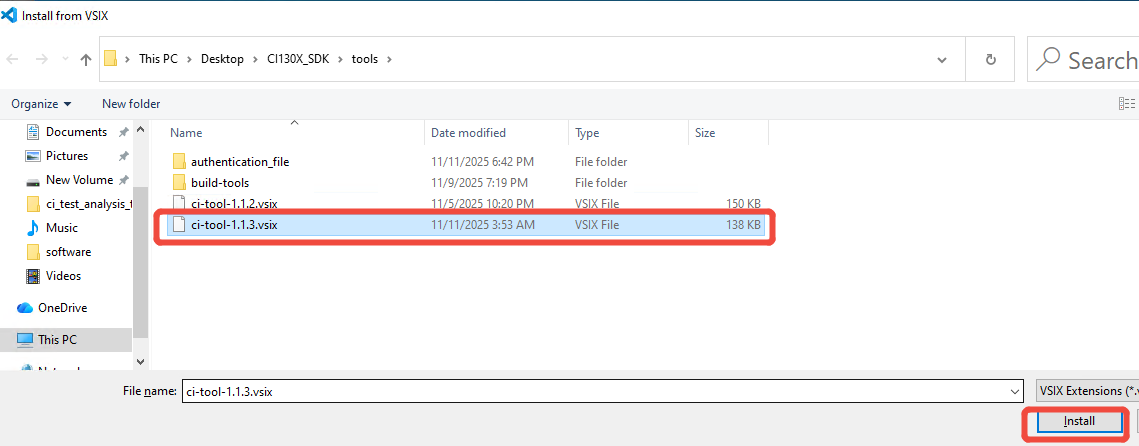
- In the file selection dialog, navigate to (SDK root directory)
/tools/ci-tool-1.1.X.vsix, select the latest version, and wait for the installation to complete.
- After installation is complete, the installed plugin will appear in the Visual Studio Code left sidebar. Click to open the plugin interface.

6 Set Up Compiler Path for CI Tool
-
Select the path for the GCC Toolchain. When you hover over the plugin interface, a
Set Compiler Pathbutton will appear in the top right corner. Click on it: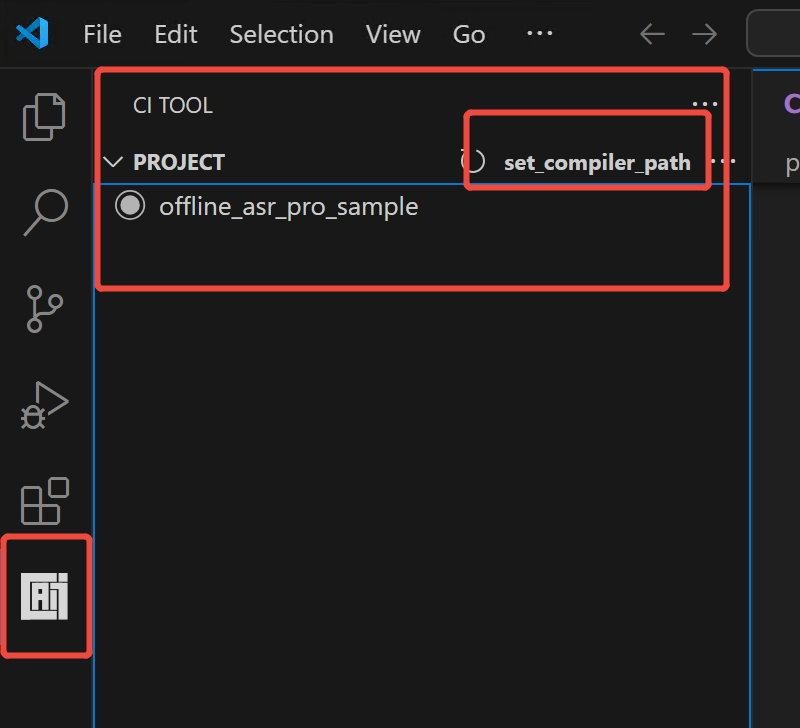
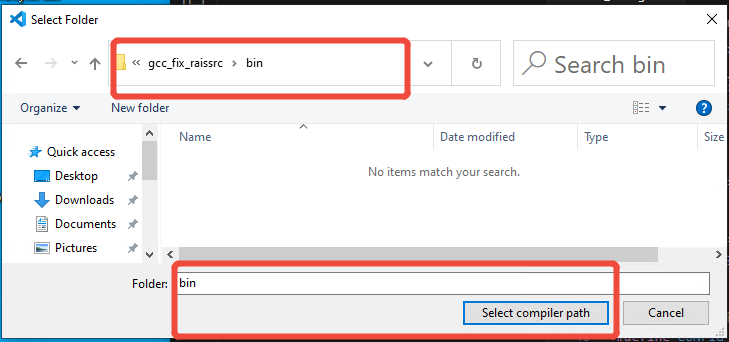
-
Select the compiler path
gcc_fix_raissrc\bin:
-
Once set up, you can compile using the compile button next to the project name.