Command Words and Firmware Production Guide
1. Speech Recognition Process and Required Resources
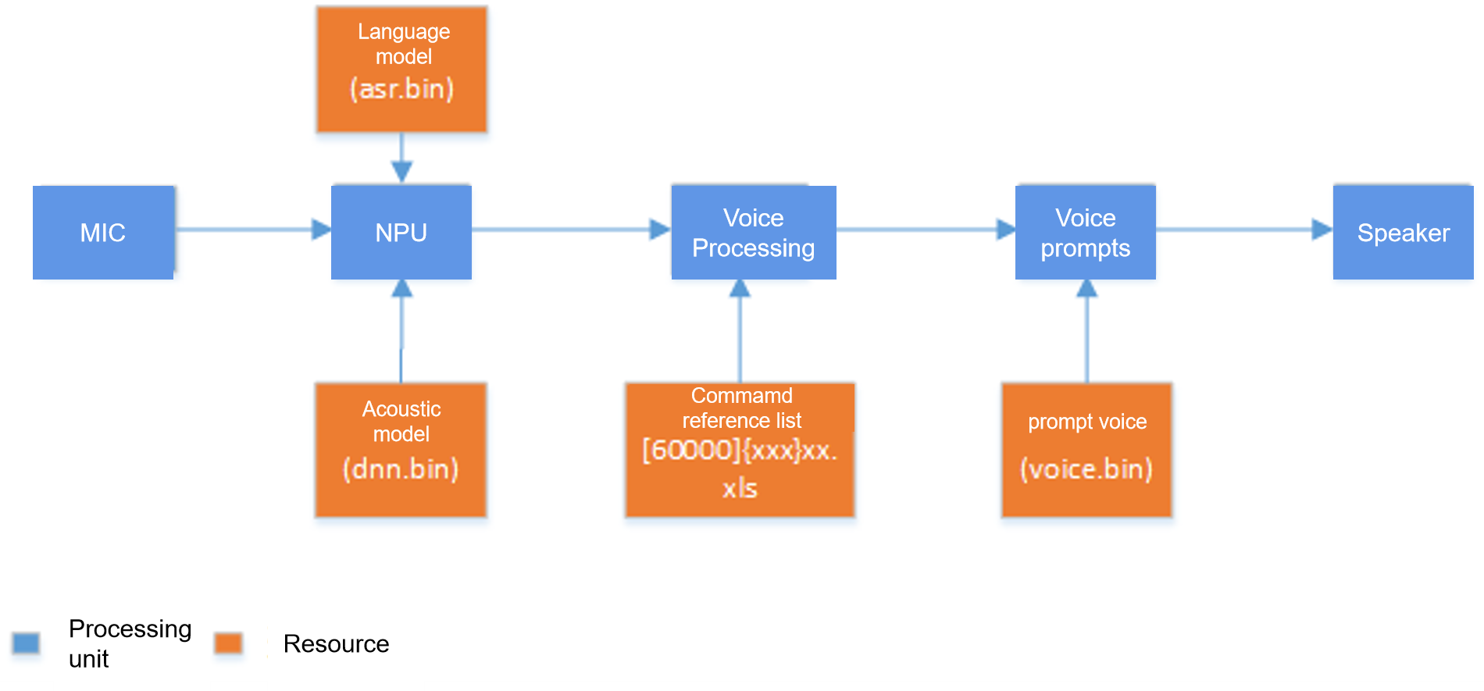
The speech recognition process and required resources are shown in the figure below. The microphone converts speech into digital signals, which are then sent to the NN (Neural Network) for recognition. NN recognition requires two resources: an acoustic model and a language model. After NN recognition, it outputs a string. The system then searches for this string in the command word information table. If not found, it’s considered a misrecognition and is ignored. If found, it’s a valid recognition, and the system retrieves the relevant information from the command word and performs the corresponding application function processing. Finally, it calls the prompt tone player to play the corresponding prompt.
Note
- Language Model: Generated based on command words, used for NN recognition.
- Acoustic Model: Used for NN recognition, typically related to factors such as language and application scenarios.
- Command Word Information Table: Stores information related to command words, such as command strings, wake-up word status, corresponding prompt tones, etc.
- Prompt Tones: Used for feedback after command word recognition. Currently supports MP3 format.
The following sections will explain how to generate the required resources.
2. Creating Command Word Model Files
2.1. Accessing the Model Creation Interface
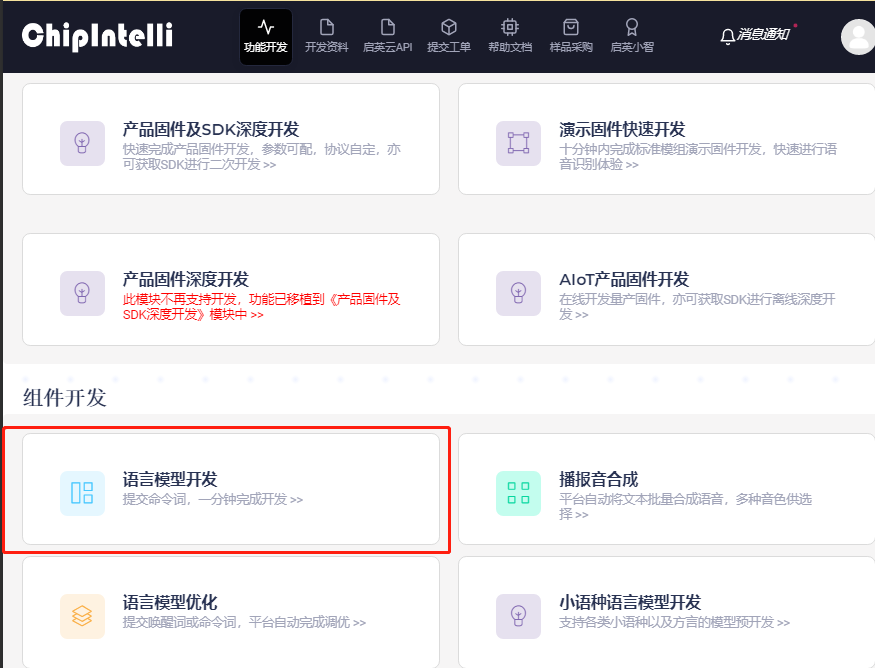
- Log in to ☞Chipintelli AI Speech Development Platform. As shown in the figure below, click the (Language Model Development) icon to enter the language model interface:
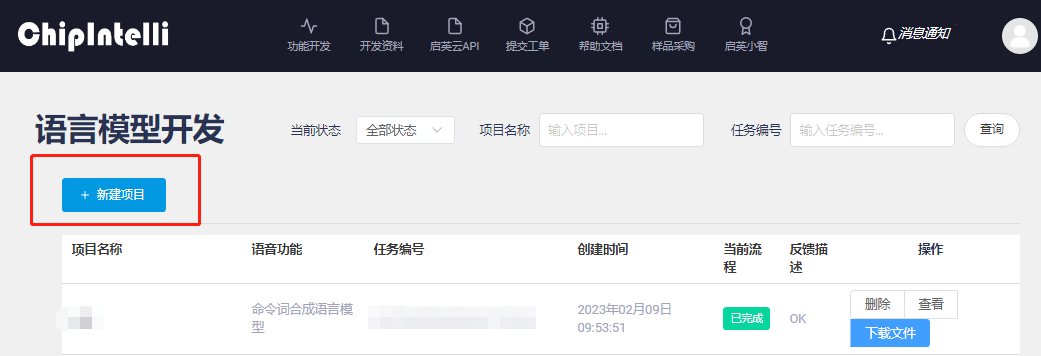
- Create a new project:
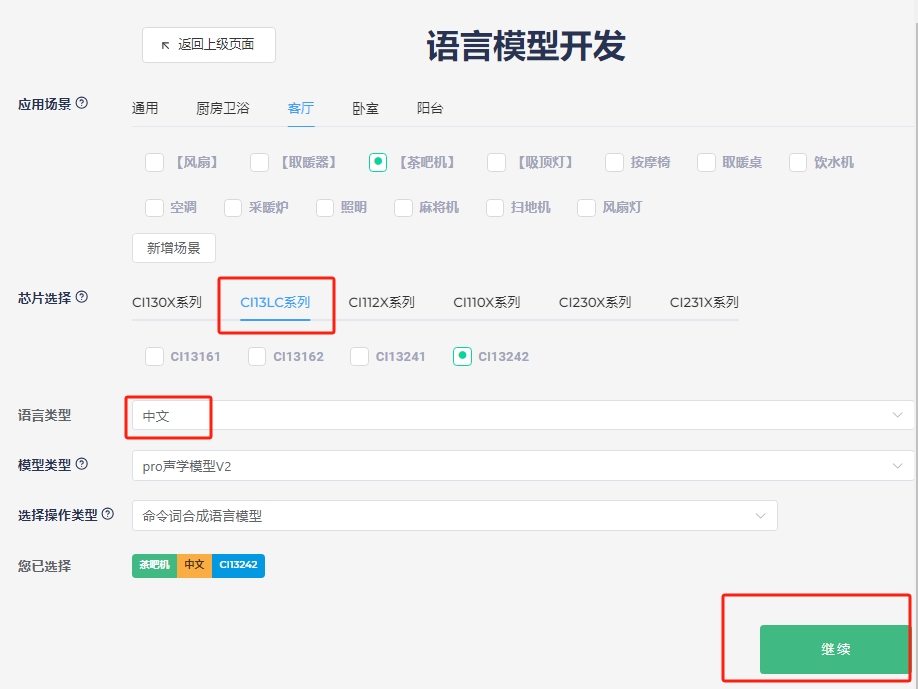
- Model Creation Interface: First, fill in the basic information, then edit the command words, and finally submit for processing.
2.2. Downloading the Acoustic Model
- In the command word editing interface, select the acoustic model and download it.
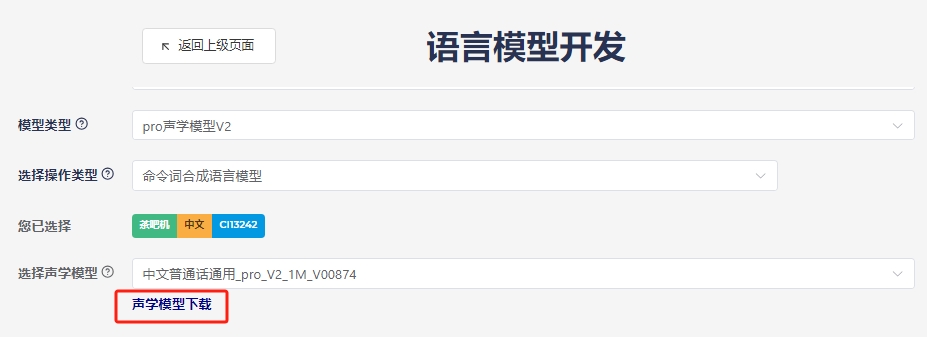
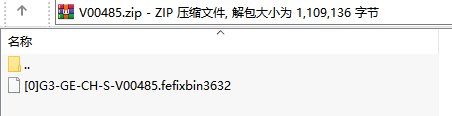
- Extract the downloaded acoustic model package to obtain the acoustic model:
2.3. Downloading the Language Model
- Select the language type from the dropdown (Chinese, English, Japanese, Korean) and download the corresponding template file.
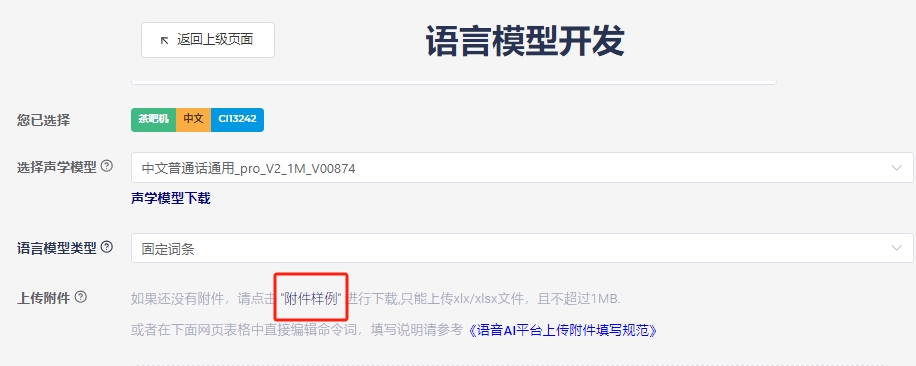
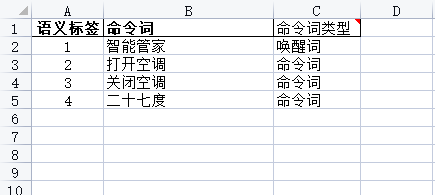
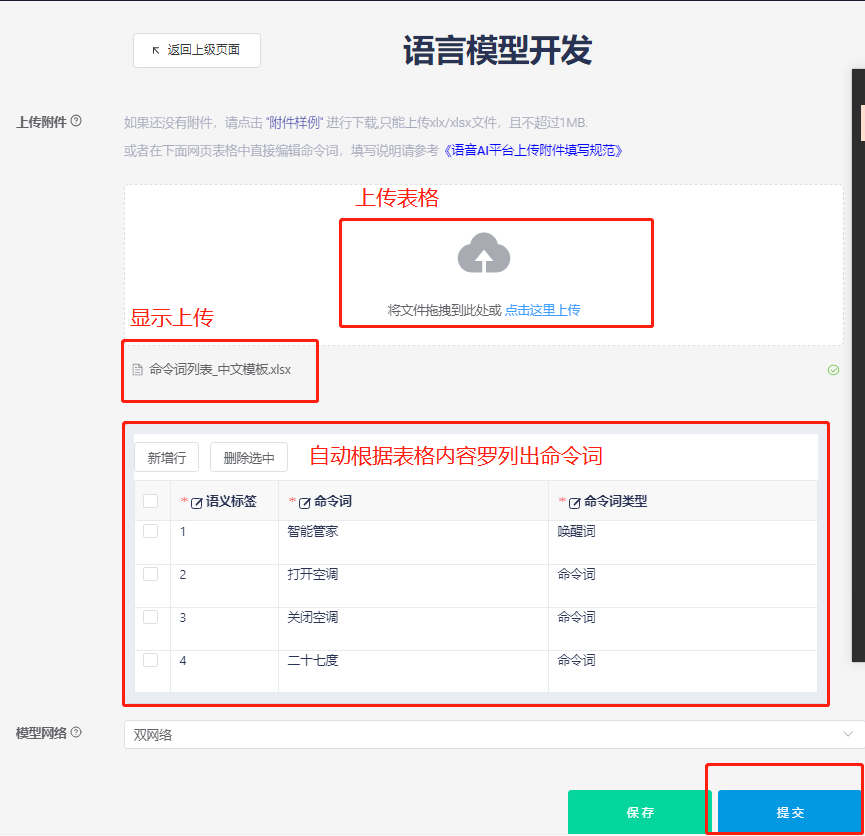
- Open the downloaded Chinese template file and edit the command words according to the file format:
Note
- Command Word: The string of the command word to be recognized.
- Command Word Type: Specifies whether the command word is a wake-up word. If a wake-up word is specified, the platform will generate dual-network data.
- Dual-Network: To improve the recognition effect of wake-up words, a separate recognition model is created for wake-up words, while other command words share another model. This means the project uses two neural network models, hence the term “dual-network”.
- Upload the command word list file and submit for processing:
-
The step of uploading the command word list file can be omitted. You can directly add command words in the command word information table by clicking “Add Row” and then click “Submit” to proceed with model creation.
-
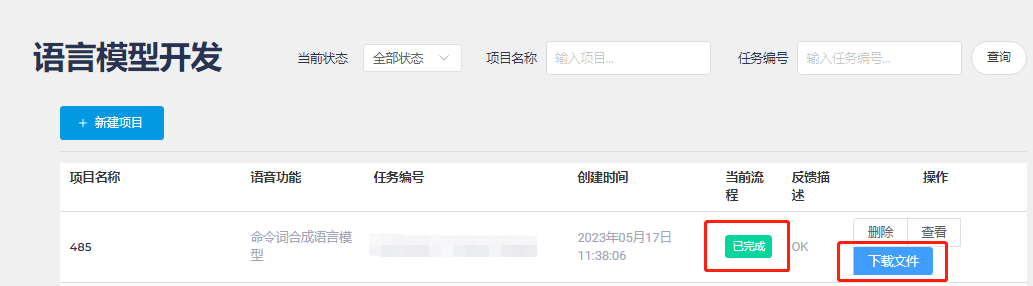
The platform will then load and generate the model. Wait until the current process shows “Completed” and click “Download Files”:
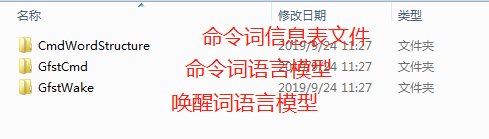
- Extract the downloaded language model package to obtain the command word information table file: “[60000]cmd_info.xlsx” and the command word/wake-up word language model file “asr_chinese_xxx_xxx.dat”:
3. Generating Prompt Tones (Voice)
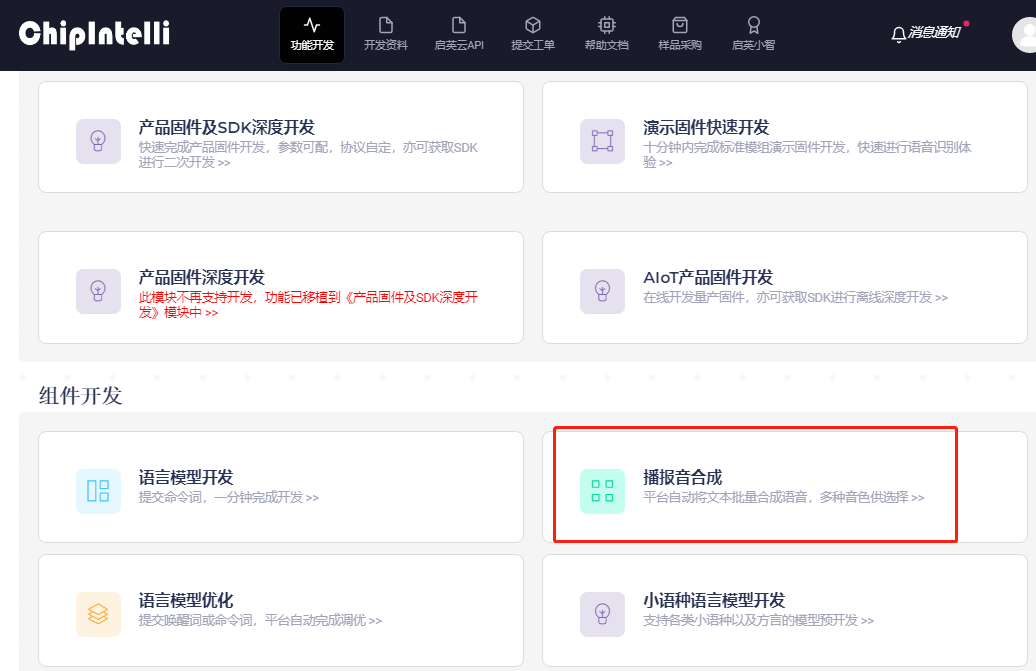
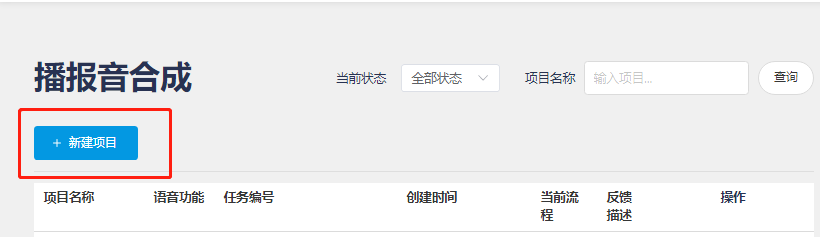
- Access the “Prompt Tone Synthesis” interface from the platform’s main menu:
- Create a project:
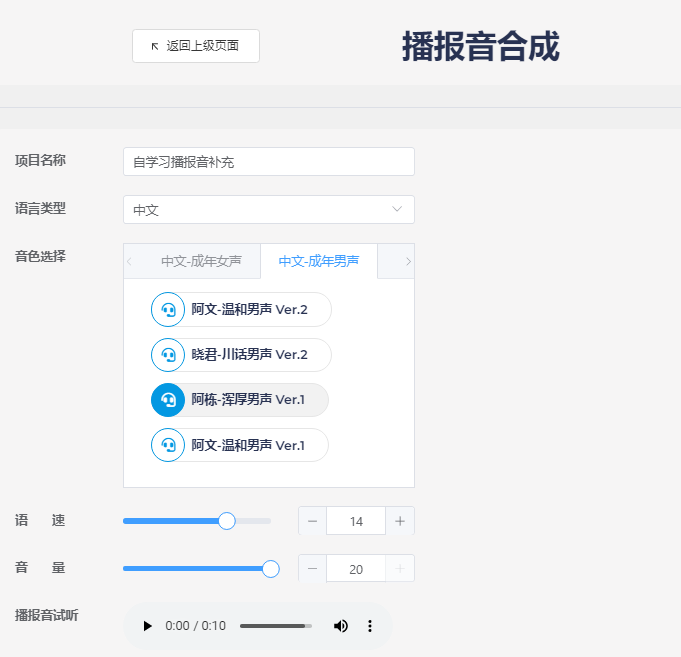
- Fill in the basic information:
1. Language Type: Select Chinese, English, or Japanese from the dropdown.
2. Download Sample File: Samples in Chinese, English, or Japanese will appear based on the selected language.
3. Voice Selection: Choose from different voice types.
4. Preview Prompt Tone: Listen to the selected voice.
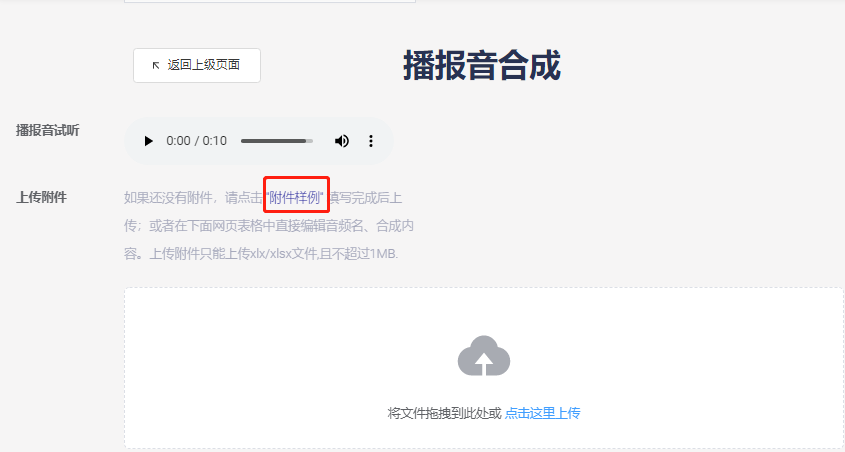
- Download the sample file:
- Open the downloaded template file. Examples for Chinese and English are shown below:
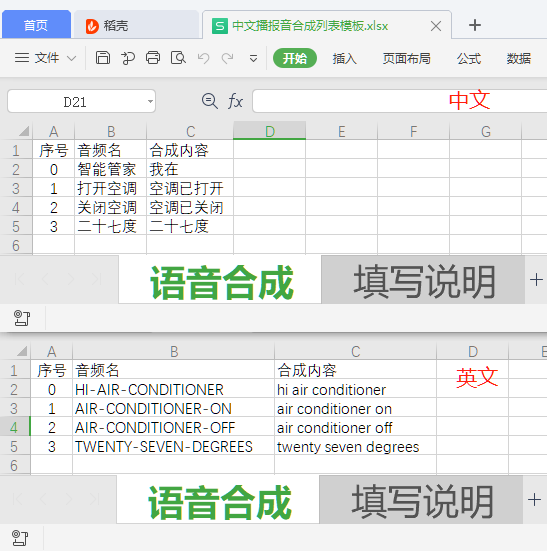
- Edit the prompt tones to be generated according to the template format:
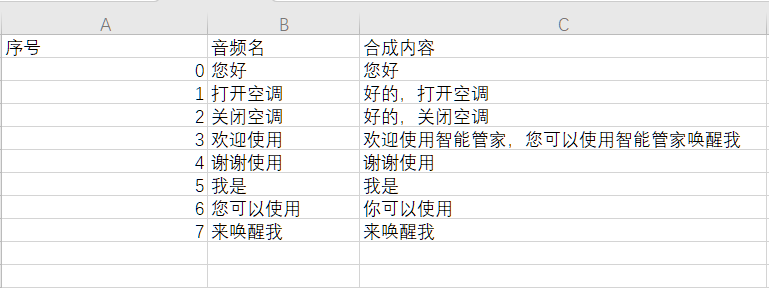
Note
- Audio ID: Specifies the ID number of the generated audio file.
- Audio Name: Specifies the filename of the generated audio file.
- Synthesis Content: The text content to be converted to speech (can include commas but no spaces between words).
Tip
There are some rules for creating prompt tones to reduce firmware size and save FLASH space. The SDK supports combined playback and selective playback, allowing you to extract common words and create a single audio file. For example, “Turn on air conditioner,” “Turn on TV,” “Turn on fan,” “Turn on desk lamp,” “Turn on living room light,” and “Turn on study light” all contain the phrase “Turn on.” You can create a separate file for “Turn on” and associate it with the command words in the command word information table using combined playback. For example, for a startup prompt like “I am xxx, you can use xxx to wake me up,” you can split this sentence into 4 audio files:
- I am
- xxx
- you can use
- to wake me up
In the command word information table, enter “1+2+3+2+4” for the prompt tone ID association. Here, “xxx” can be multiple names. By using the combined and selective playback features, you can choose the appropriate prompt at runtime without generating a separate set of prompt tones for each name.
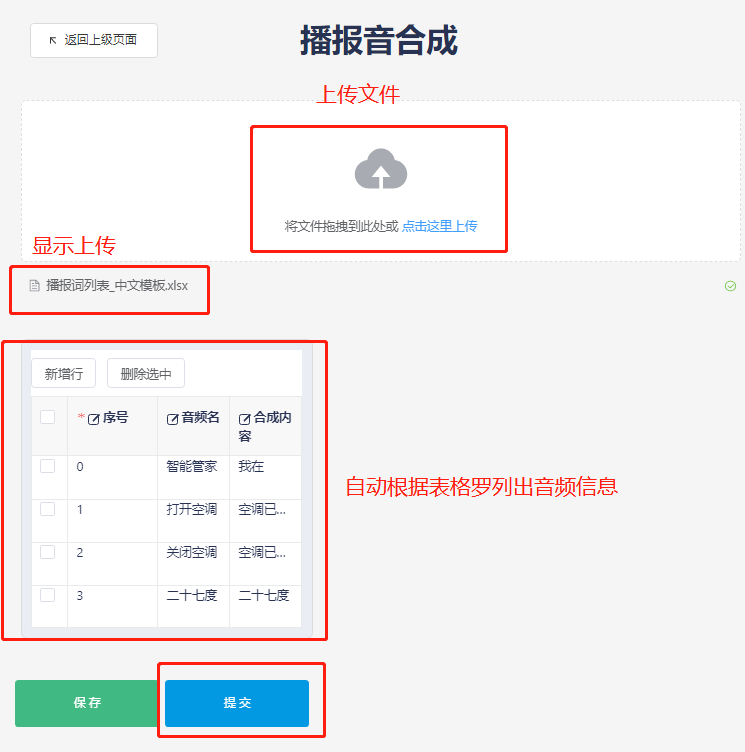
- Return to the “Prompt Tone Synthesis” interface on the platform, fill in the project information, upload the edited audio string file, and click the “Submit” button. The platform will start generating the speech, which may take some time.
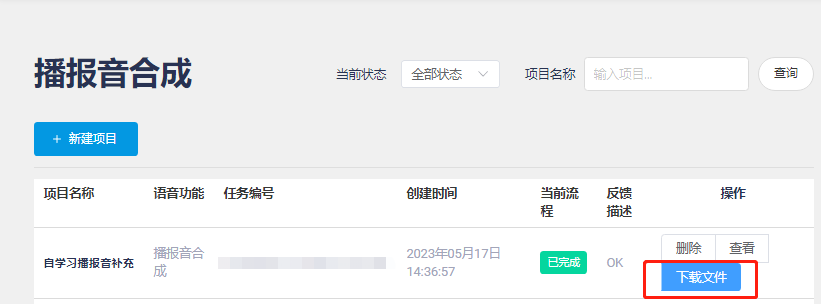
- Wait for the page to indicate successful generation, and a “Download Synthesized Files” button will appear. Click to download:
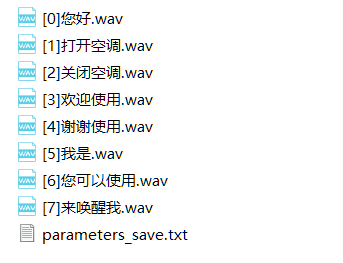
- The following audio files will be downloaded:
4. Creating Firmware
4.1. Editing the Command Word Information Table File
Copy the command word information table file “[60000]cmd_info.xlsx” downloaded in Section 2.2 to the path: %SDK_PATH%\projects\sample_xxx\firmware\user_file\cmd_info\, replacing the original file starting with [60000]. Make necessary modifications based on the project logic, mainly associating prompt tones, setting wake-up words, and adjusting recognition sensitivity.

Note
- Model Name: Used to set the model name corresponding to the current set of command words. Currently, there are two: NN ID (Acoustic Model File ID) and ASR ID (Language Model File ID).
- Model ID: Used to set the model ID number corresponding to the current set of command words. You can fill in 0 or a number greater than 0, but it must match the [ID] prefix of the file. For example, the file
[3]asr_xxx_cmd.dathas an ID of 3, so the Model ID for ASR ID should be 3. - Command Word: The command word string.
- Command Word ID: A user-defined ID for the command word, making it easier to implement logic quickly. By default, different command words cannot use the same Command Word ID. If necessary, you can modify the script file “cmd_info.bat” by adding
--no-cmd-id-duplicate-checkafter thecmd_info.execommand. - Semantic ID: A Chipintelli-defined string semantic ID that is unique. If the product considers home networking, this ID can resolve command word conflicts across multiple devices.
- Confidence: Used to adjust the recognition sensitivity of command words to address misrecognitions.
- Wake-up Word: Specifies the wake-up word.
- Combined Word: Specifies a combined word that serves as both a wake-up word and a command word, eliminating the need for a separate wake-up step.
- Expected Word: Used when certain command words are particularly difficult to recognize.
- Unexpected Word: Used when certain command words are easily recognized but may cause misrecognition of other similar correct command words.
- Special Word Count: Used for short command words that might intercept longer command words with the same content. For example, “Heat” and “Heat for three minutes” might both be recognized as “Heat.” The solution is to set a special word count for the “Heat” command. After recognizing “Heat,” the system waits briefly to see if a similar command follows. If so, it discards the “Heat” recognition. However, setting this value too high can significantly increase the response time for “Heat.”
- Prompt Tone Type: Mainly used for multiple selective prompts to specify the selection method. Currently, two types are supported: “Random Selection” (set
select_indexto -1 when calling the playback interface) and “Custom Selection” (setselect_indexto the desired value when calling the playback interface). - Prompt Tone ID: The ID of the prompt tone file (i.e., the audio sequence number from Chapter 4). Use ‘+’ to connect multiple prompt tones (up to 16 tones in combination). If there are multiple selective prompts, each option occupies one column, with a maximum of 127 columns.
- Model Group ID: Used for model switching. In the SDK demo, 0 is the default command word model, and 1 is the wake-up word model.
Tip
- If there are prompts not associated with any command word, you can create a dummy command word. The command word string is not used to generate the language model and will not be recognized but can be played back.
- The ID in the command word information table filename must be 60000 and cannot be modified, e.g.,
[60000]cmd_info.xlsx. - Use combined playback, selective playback, and model switching appropriately to reduce firmware size and save FLASH space.

4.2. Editing Code to Implement Project Requirements
- User logic is mainly implemented in the
system_msg_deal.cfile. - The
UserTaskManageProcessfunction is the user logic processing task, where various messages are handled, such as speech recognition messages, button messages, and UART messages. - Locate the message to be processed and implement the corresponding logic, such as I/O control, prompt tone selection, model switching, parameter adjustment, and UART reporting.
- If there is information that needs to be saved before shutdown, use the
ci_nvdmmodule. Refer to the volume setting code in the standard demo in the SDK.
Note
- If you use command words to switch models and the model-switching commands have voice prompts, pay attention to the order of calling the model-switching interface and the voice prompt function, which depends on the model where the prompt tone is located.
4.3. Building and Flashing the Firmware
4.3.1. Copying Resource Files
The firmware production directory is shown below:
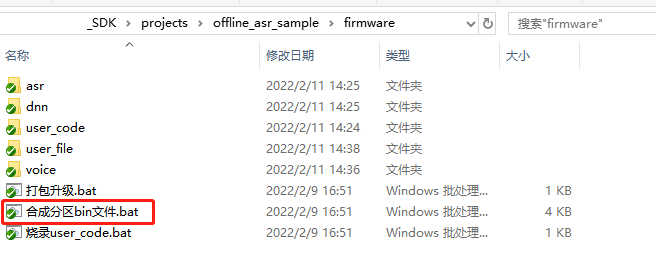
- Place the language model file (
asr_zn_214_CI13LC.dat) generated in Chapter 2 into theasrdirectory under thefirmwaredirectory. Set the file ID according to the ASR ID in the command word information table edited in Section 4.1, e.g.,[0]asr_zn_214_CI13LC.dat. If using dual-network, place both the wake-up word and command word language models in this directory. - Place the acoustic model file (
GE-CH-S-V00214.fefixbin3676) generated in Chapter 2 into thednndirectory under thefirmwaredirectory. Set the file ID according to the NN ID in the command word information table edited in Section 4.1, e.g.,[0]GE-CH-S-V00214.fefixbin3676. If the model already exists in the NN directory, no replacement is needed. - Place the prompt tone files (WAV format audio files from the
TTS_wavdirectory) generated in Chapter 3 into thevoicedirectory under thefirmwaredirectory. Set the folder ID according to the VOICE GROUP in the command word information table edited in Section 3.1, e.g.,[0]voice. - Compile the project code to generate
user_code.binin theuser_codedirectory. - Make the partition bin files by double-clicking “make_partition_bin.bat”. After completion, bin files with the same names as the directories will be generated in the
asr,dnn,user_file, andvoicedirectories.
4.3.2. Packaging the Firmware
Double-click “Package Firmware.bat” to package the upgrade. In the pop-up interface, select “CI13LC,” choose the corresponding chip model (e.g., CI13162), and then select “Firmware Packaging.” For more information on using the tool, press F1 to view the help:
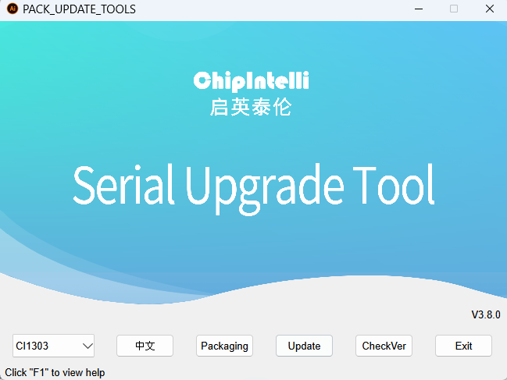
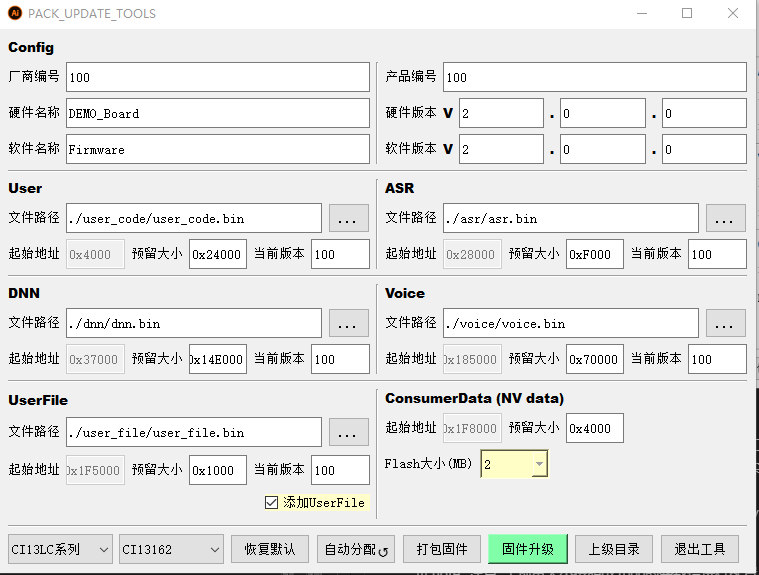
Enter the packaging interface:
Note
- Config: Software and hardware information area.
- User, ASR, DNN, Voice, UserFile, etc.: Firmware partition information area.
- Menu bar.
Packaging Steps:
-
- Fill in the software and hardware information in the version information area.
-
- Select or fill in the paths to the partition bin files.
-
- Click “Package Firmware.”
-
- If a pop-up indicates an address conflict, click “Auto Allocate” or manually adjust the partition sizes, then repeat step 3.
-
- A pop-up saying “Firmware generated successfully” indicates successful packaging.
-
For more information about the firmware packaging interface and troubleshooting, refer to the SDK documentation ☞《UART Upgrade Tool User Guide》.
4.3.3. Flashing the Firmware
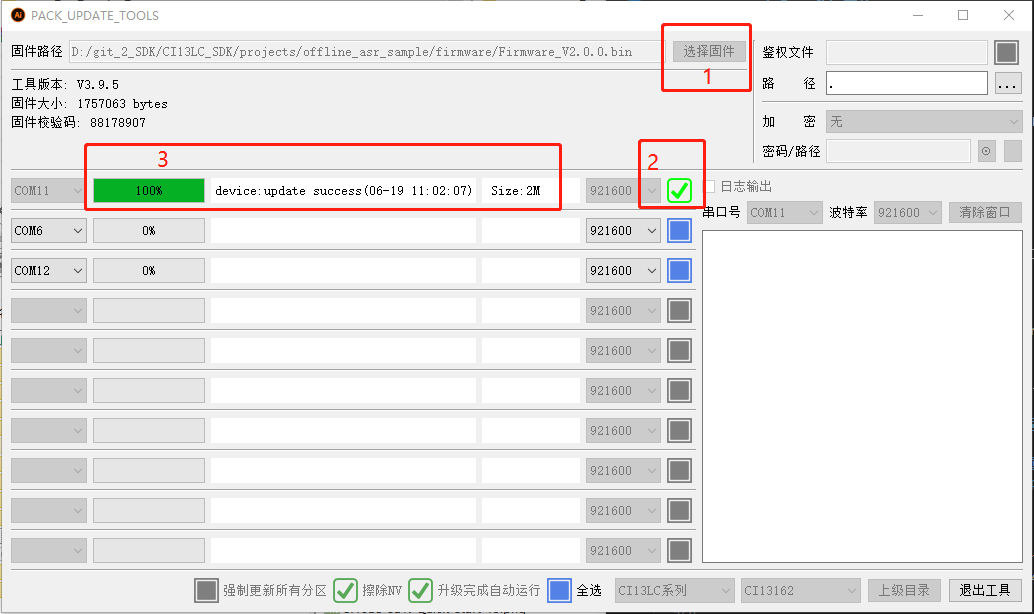
Click “Firmware Update” in the pack and updatetool:
-
- Select or fill in the firmware path.
-
- Check the serial port to which the device to be upgraded is connected.
-
- Other options: Update all partitions, encrypt.
-
- Switch the module to upgrade mode (short the PG and EN pins).
-
- Restart the device to be upgraded to start the upgrade.
-
- Wait for the upgrade to complete. If successful, the device will automatically boot into the firmware code. If there is a power-on prompt tone, you will hear it.