Installation and use of compiler software
1. Overview
This document serves as the installation and User Guide for the CI13LC series chip Software Development Kit (SDK) environment, designed to assist developers in quickly setting up their development environment.
2. Software Download
- Official website ☞Visual Studio Code to download VSCodeUserSetup. Version VSCodeUserSetup-x64-1.60.0.exe or higher is required.
3. Software Installation
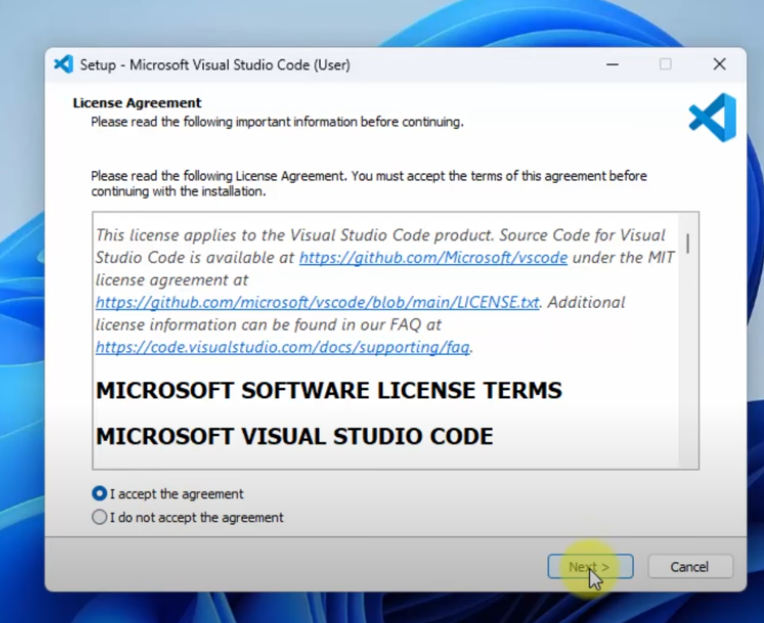
- Double-click to install VSCodeUserSetup-x64-1.60.0.exe, accept the license agreement, and proceed to the next step.
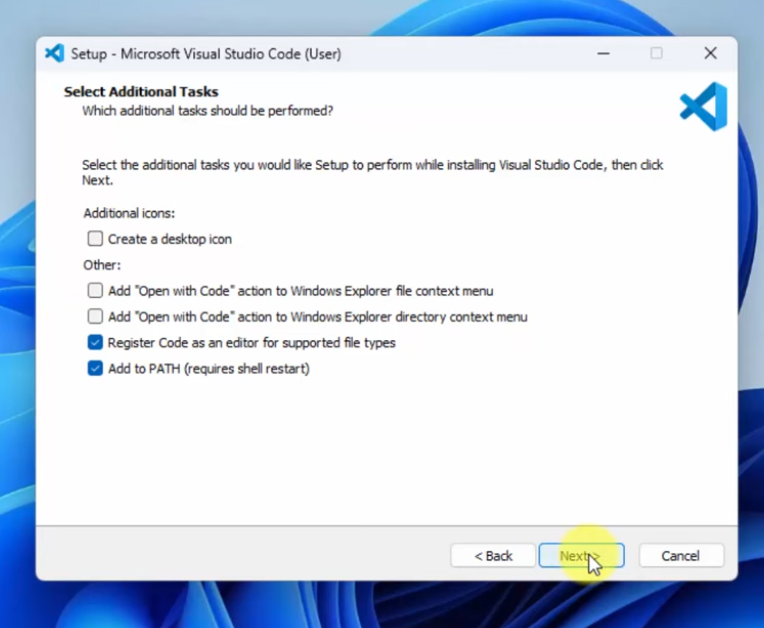
- Check the following configurations, then click Next:
- Click Install
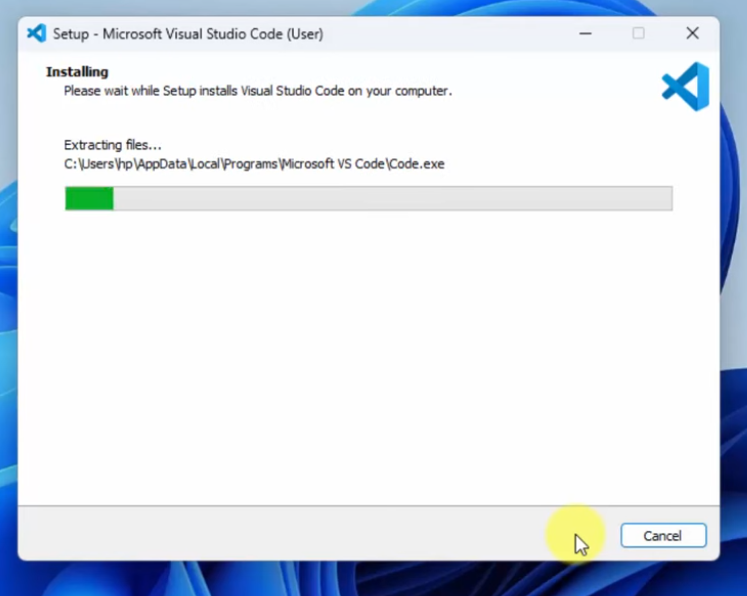
- Wait for the installation to complete.
3.1. How to Open a Project
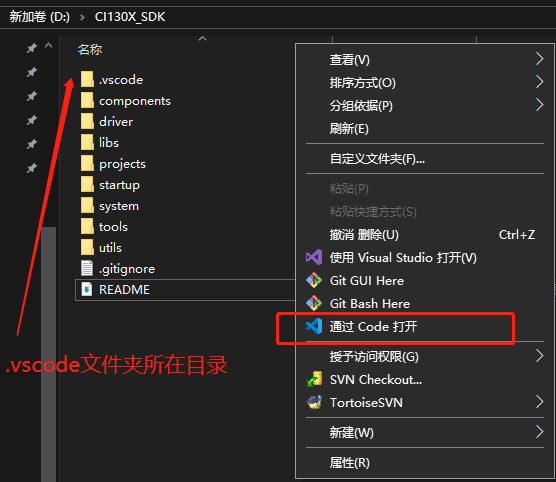
Method 1: Right-click in the CI13LC_SDK folder (the directory containing the .vscode folder) and select “Open with Code”:
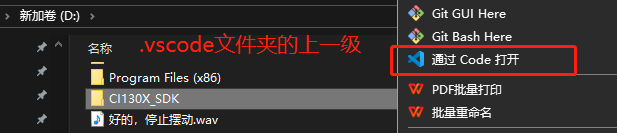
Method 2: Select the CI13LC_SDK folder (the parent directory of the .vscode folder), right-click, and choose “Open with Code”:
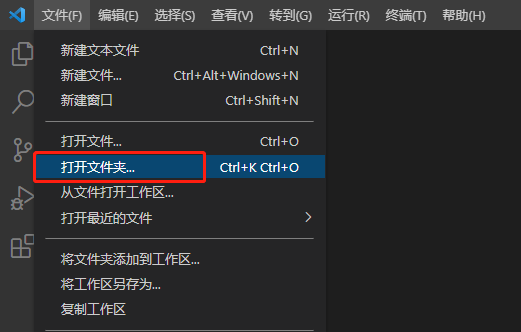
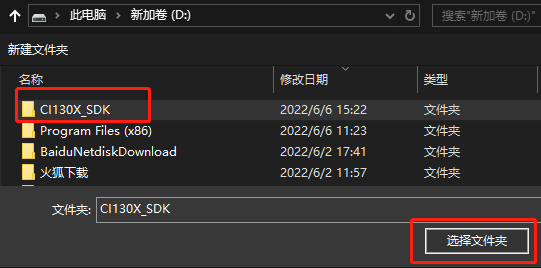
Method 3: Open the VSCode software first, then go to the menu bar -> File -> Open Folder, and select the CI13LC_SDK folder (the parent directory of the .vscode folder) as shown in Figure 3-7.
4. Compilation Steps
4.1. Method 1: Keyboard Shortcut
- Press Ctrl + Shift + B, then select “compile” or “clean” from the pop-up window.

4.2. Method 2: Click the Icon
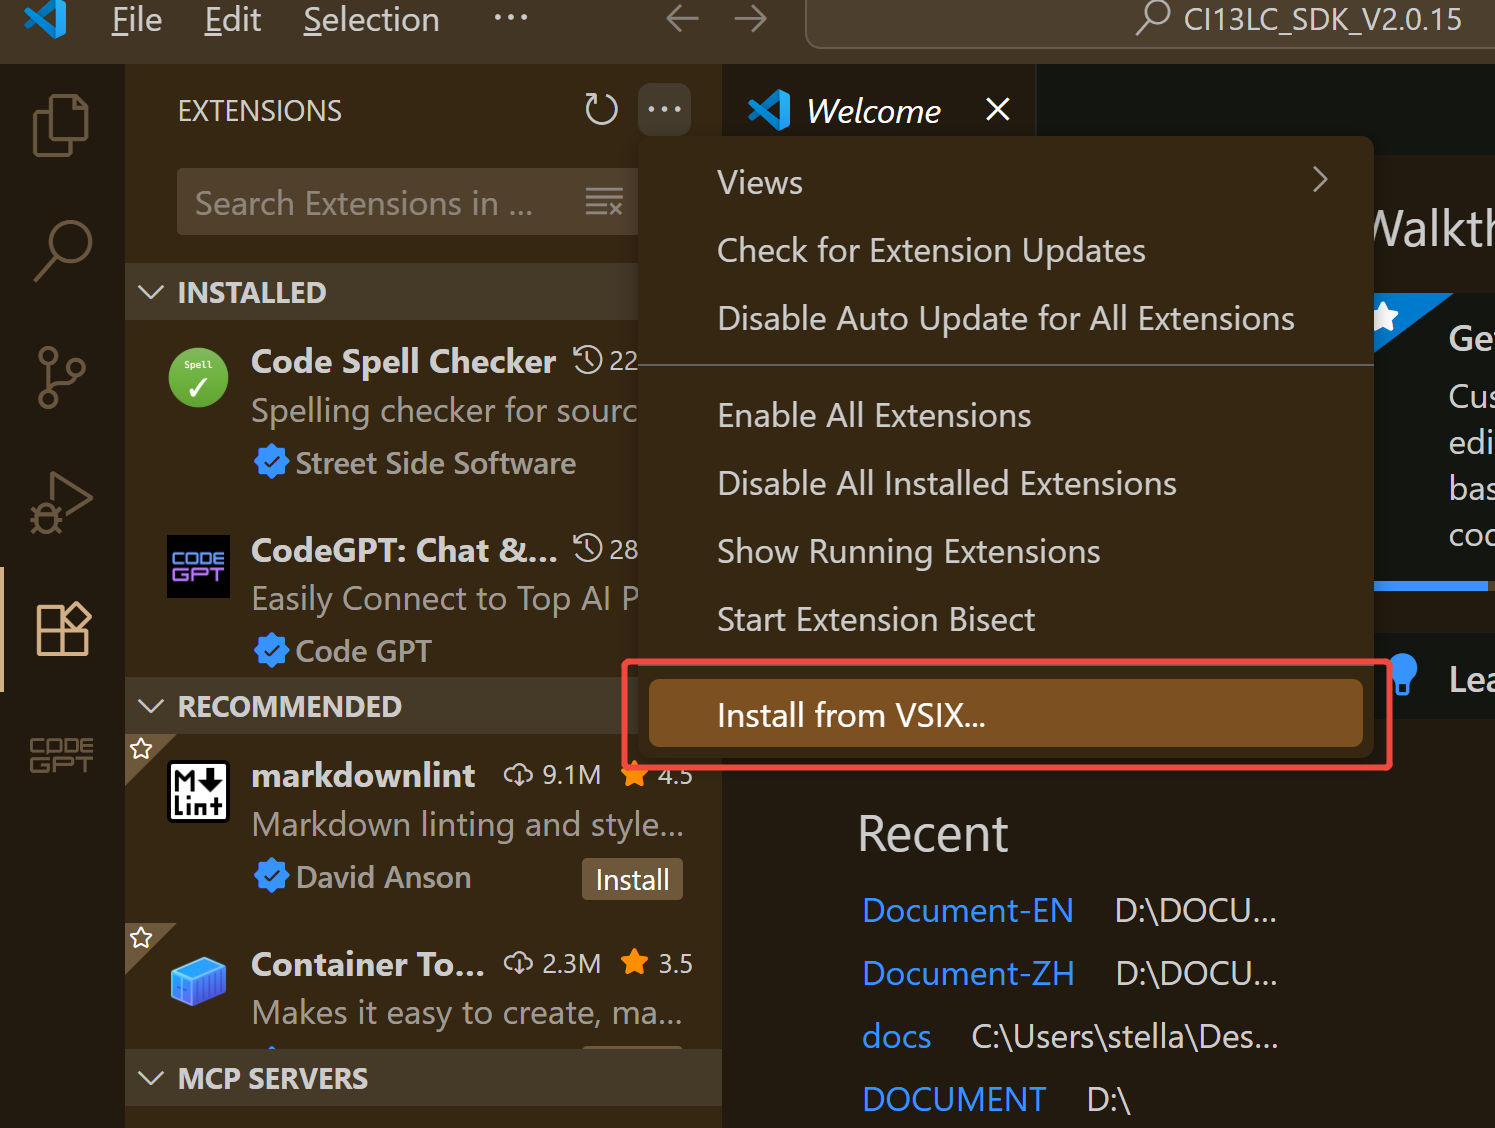
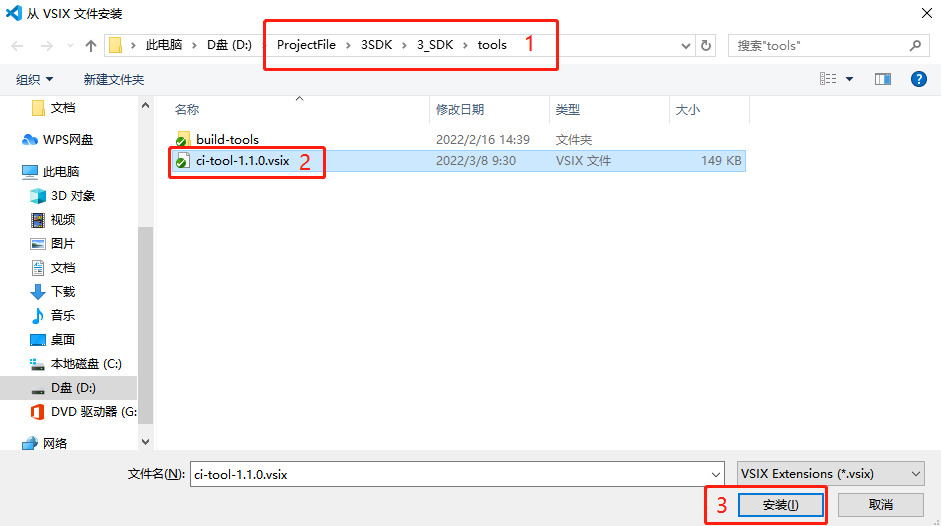
- First, install the extension. Click the software store icon on the left side as shown below, then click the three-dot menu icon in the top-right corner.

- In the options that appear after clicking the three dots, select “Install from VSIX” or “Installed from VSIX”.
- Locate and install
SDK/tools/ci-tool-1.1.0.vsix. Wait for the installation to complete, and the following compilation icons will appear in the top-left corner.
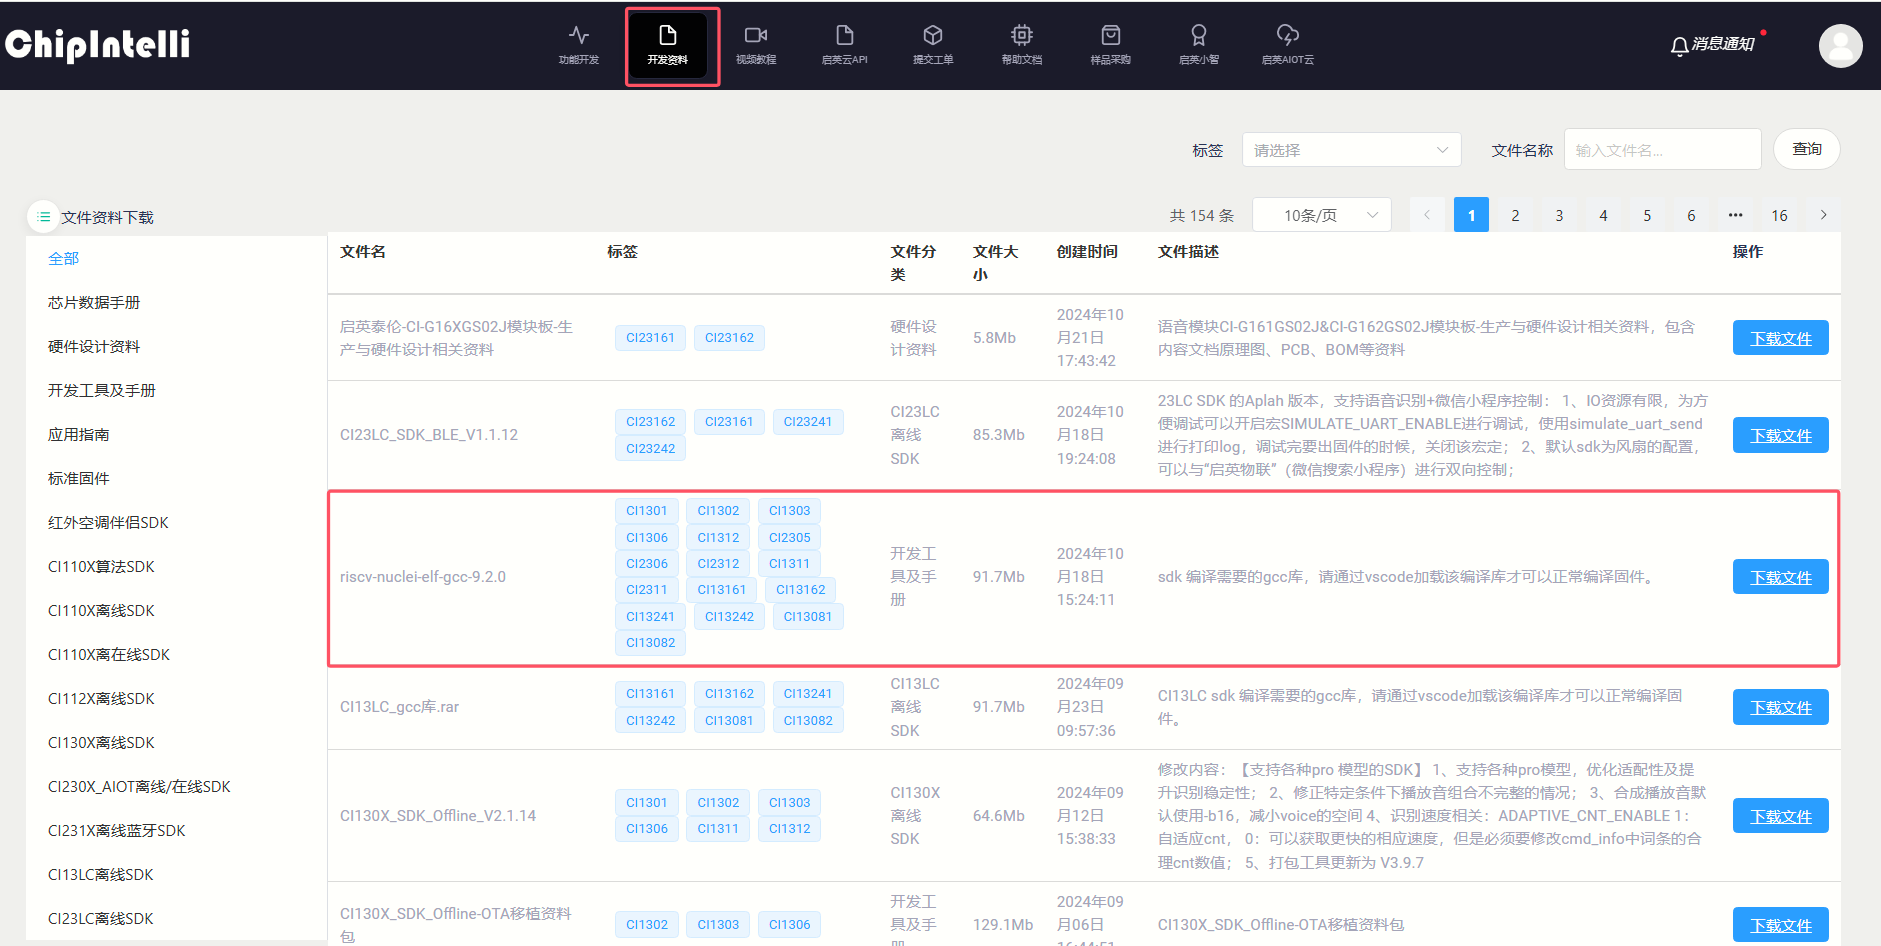
- Install the GCC toolchain. The GCC toolchain can be downloaded from the ☞Chipintelli AI Speech Development Platform resource library.
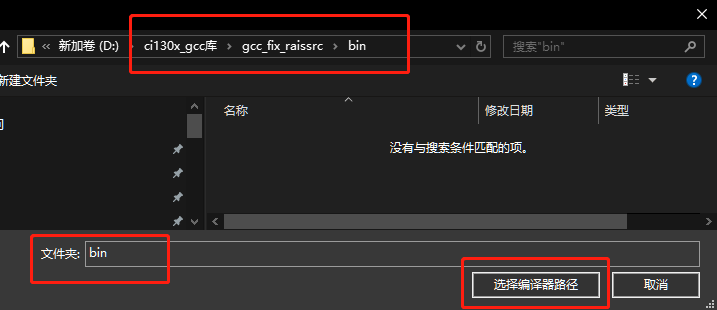
- Select the compiler path:
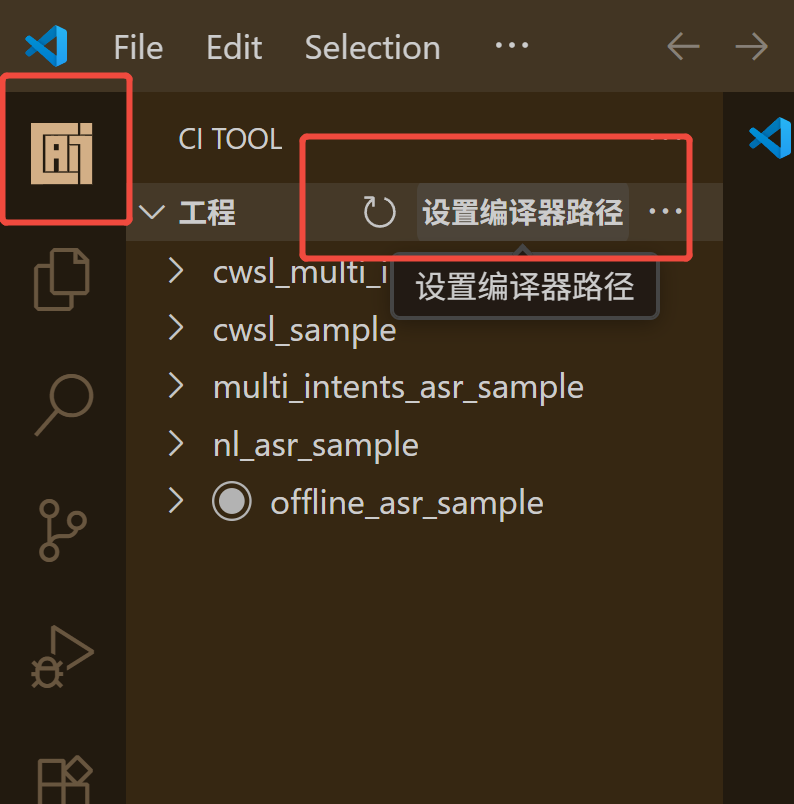
- Select the compiler path:
- Click the AI icon shown below. All project names will be displayed in the top-left option box.

-
Right-click on the project name you want to compile. The following options are available:
-
1: “Build”: Compile the project
-
2: “Clean”: Clean the project
-
3: “Set as Active Project”: Set as the default project for compilation using keyboard shortcuts
-
4: “Set Programming Port”: Enter the COM port (e.g., com3, case-insensitive). Ensure the port is correct and not in use.
-
5: “Build Partition Bin Files”: Run the “make_partition_bin.bat” script in the VSCode output window
-
6: “Start Pack and UpdateTool”: Launch the UART upgrade tool executable
-
7: “Program user code”: Flash the
user_code.binfile
5. How to Add Source Files
Note
If you add new source code files to the CI13LC series chip SDK, you must locate the project file at SDK\projects\offline_asr_pro_sample\project_file\source_file.prj and add the files to the project compilation as shown in the following examples.
5.1. Adding .h Header Files
- Locate the
//header file path.comment and add the relative path to your .h header file as shown in the example:
//header file path.
include-path: driver/ci13lc_chip_driver/inc
include-path: driver/boards
5.2. Adding .c Source Files
- Locate the
//source files.comment and add the relative path to your .c source file as shown in the example:
//source files.
source-file: driver/ci13lc_chip_driver/src/ci13lc_core_eclic.c
source-file: driver/ci13lc_chip_driver/src/ci13lc_core_timer.c
5.3. Adding .a Library Files
- Add the relative path to your .a library file as shown in the example:
library-file: libs/libnewlib_port.a
library-file: libs/libasr.a
6. Firmware Programming
- For initial firmware programming, use the pack and updatetool to program the merged firmware. Refer to steps 4 and 5 in ☞《CI13LC_SDK_Quick_Start》. For development and debugging convenience, this compilation software includes a feature to program only the user code. Below is the method and precautions for programming user code during debugging:
6.1. Step 1: Package the Firmware
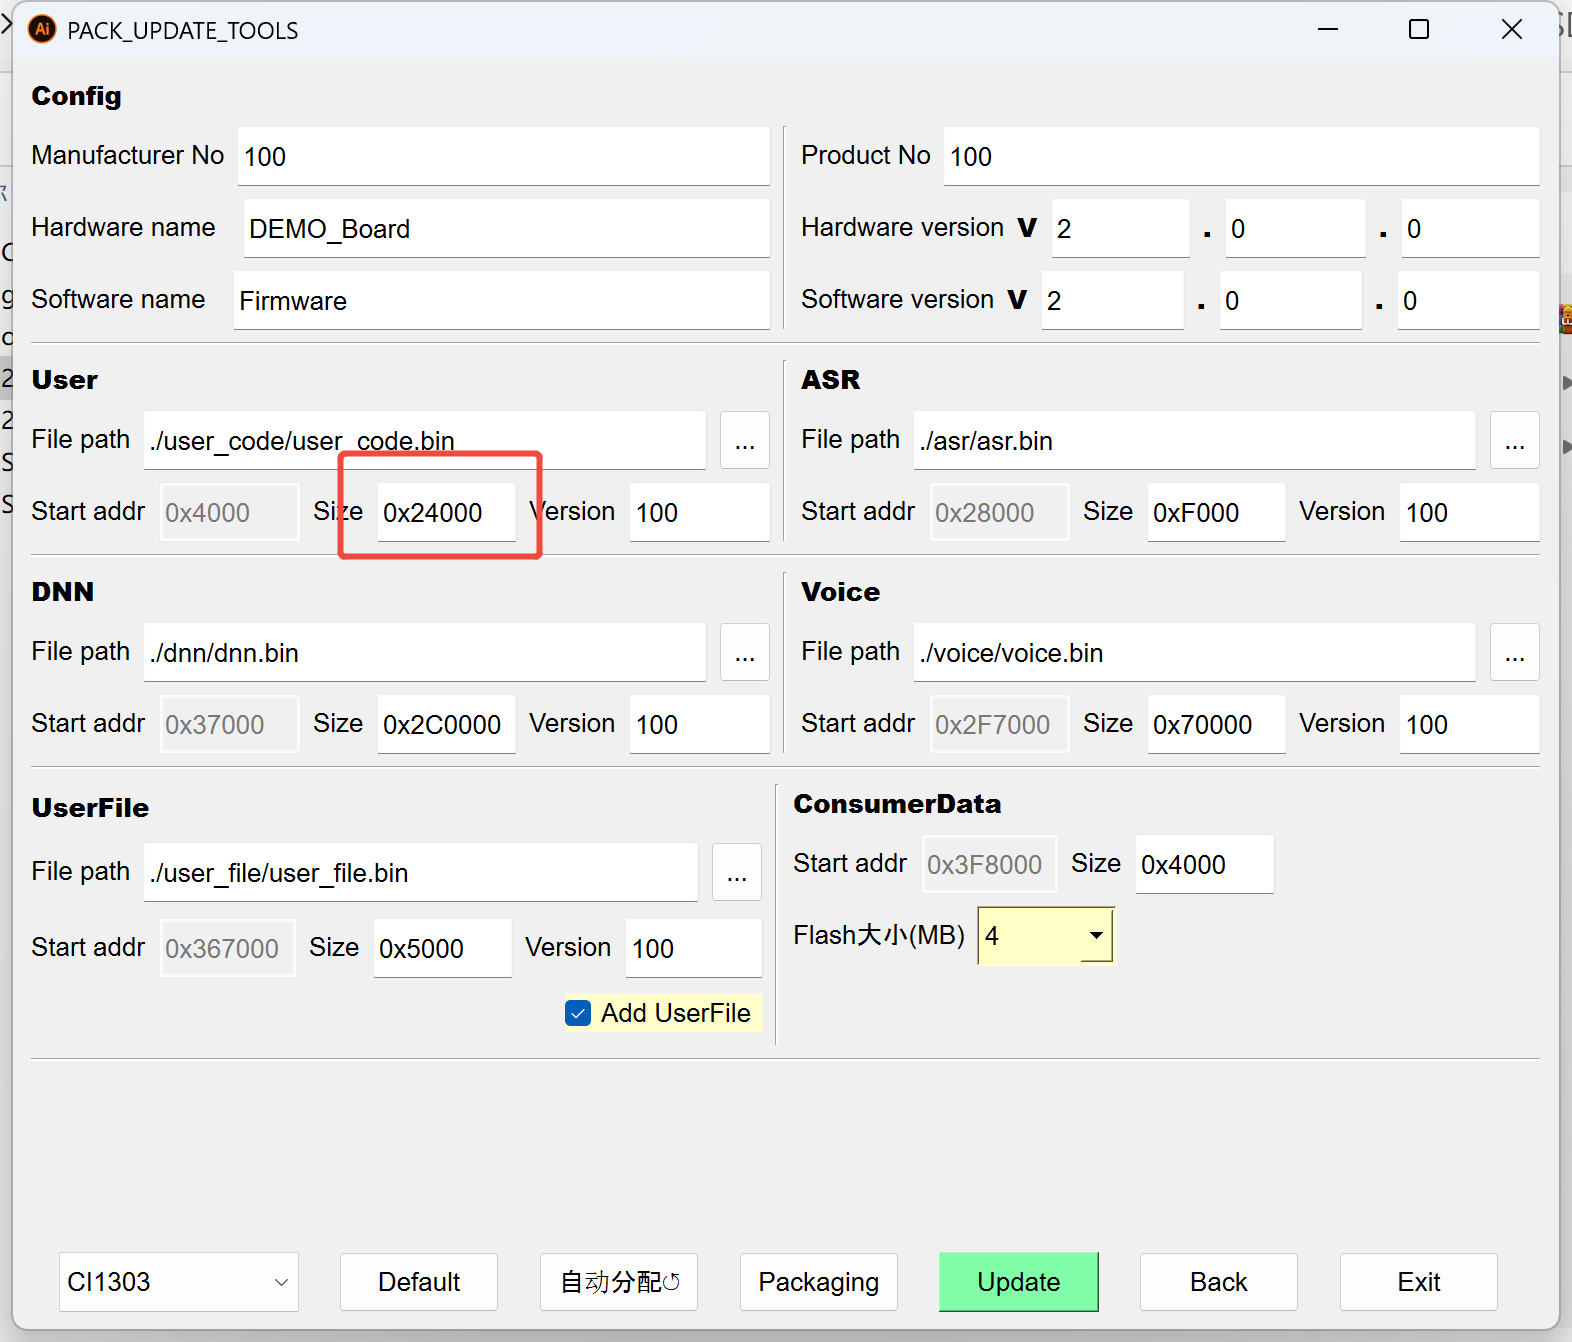
- Launch the pack and updatetool, navigate to the firmware packaging interface, and reserve an appropriate size for the user code partition as shown below:
- Click “Firmware Update” to program the merged firmware
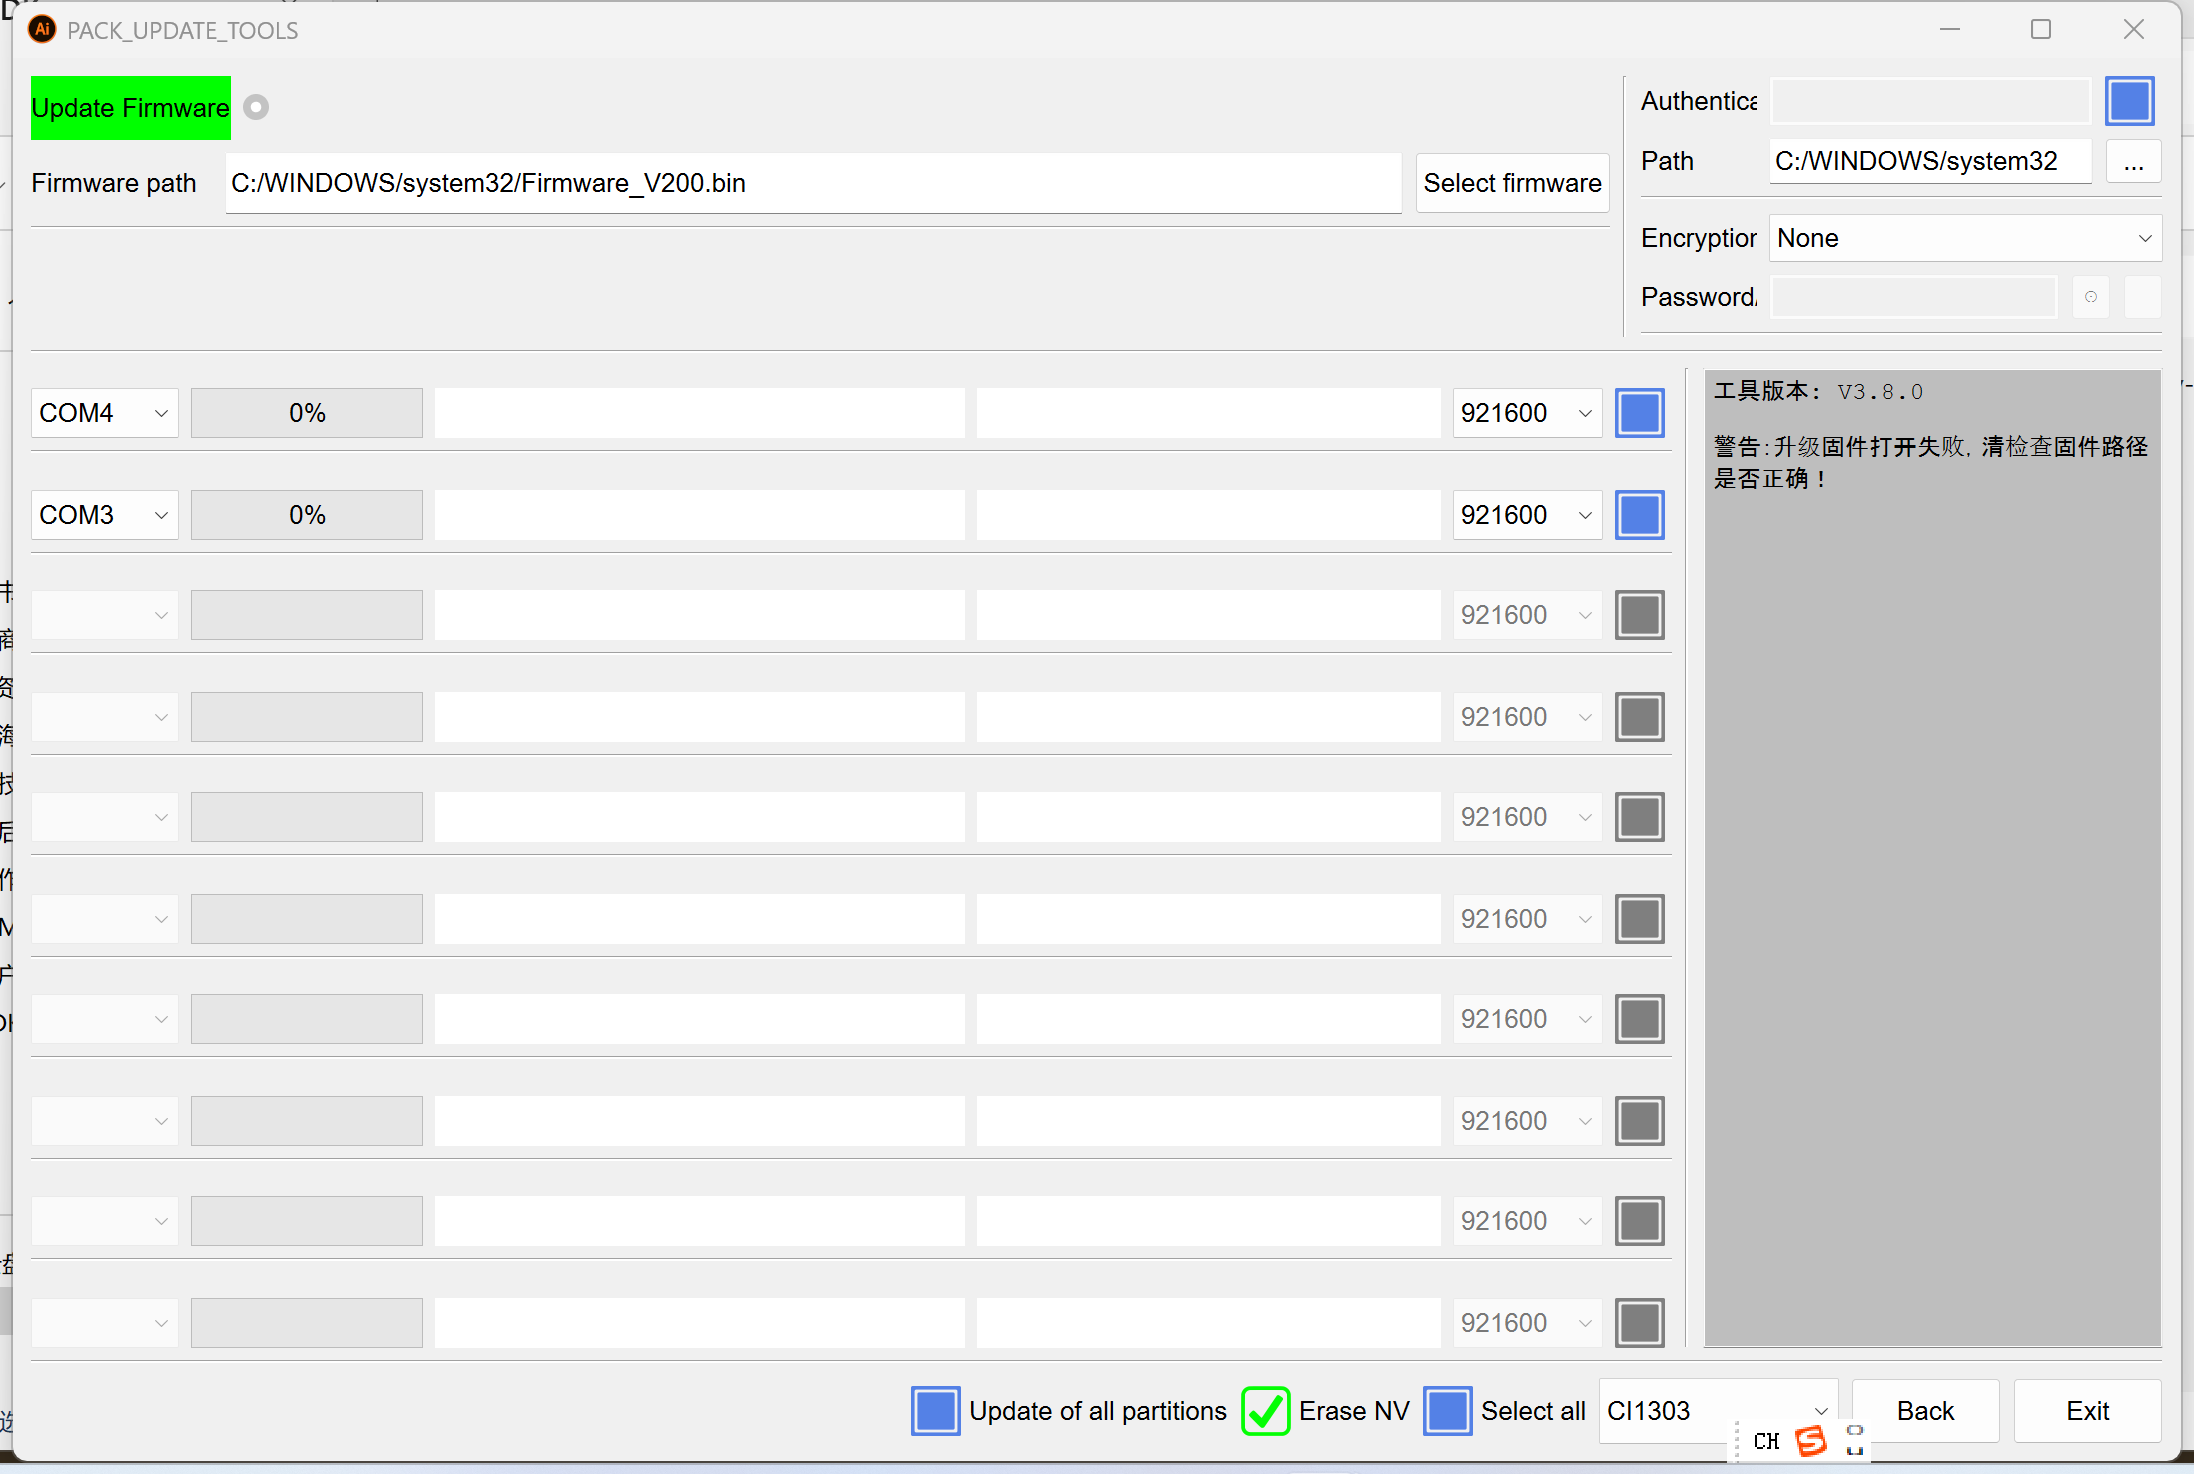
6.2. Step 2: Program User Code
-
For modifications limited to the user code partition during debugging, you can program directly in the VSCode compiler without repackaging the firmware. The upgrade method is as follows:
-
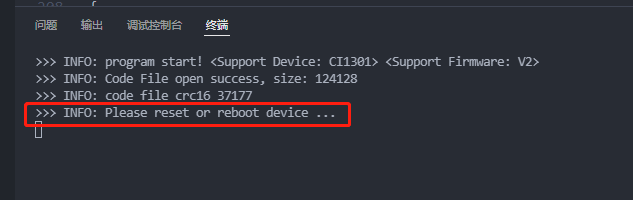
Right-click the project name and select “Program user code” (or press Ctrl+F11), then follow the on-screen instructions to reset the hardware:
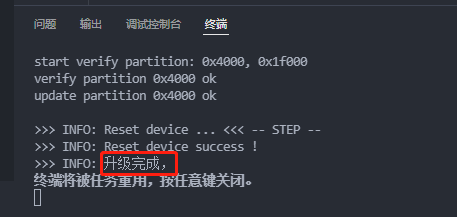
- The upgrade completion interface will appear as follows:
7. Frequently Asked Questions
7.1、Failed to Upgrade use_code
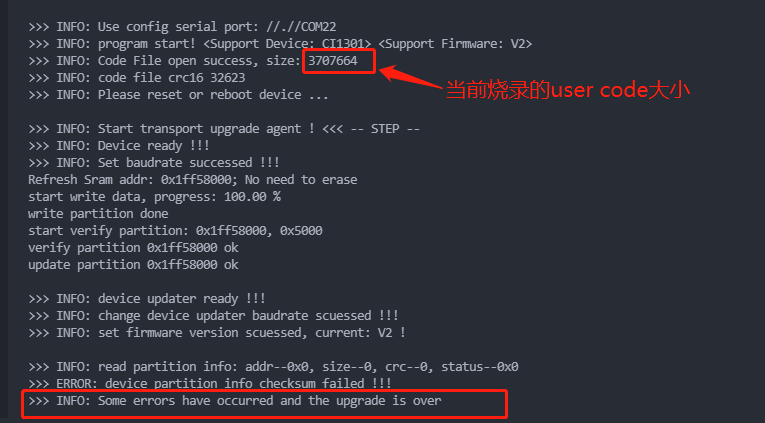
- Reason: The current size of use_code.bin exceeds the reserved size of the user partition in the firmware.- - - Solution: Use the firmware packaging tool to repackage the firmware and increase the user partition to a reasonable size. Refer to Section 6.1 for guidance.